How to Deploy a Serverless Database With Cloud Run
Table of Contents
Serverless cloud services have made it much quicker and easier to get a project off the ground on Google Cloud. Whether it’s a personal website to manage your home automation or an Ecommerce startup, the ability to get started on a pay per usage model unlocks innovation which might otherwise be blocked by the cost of provisioning self-managed infrastructure. At the time of writing, Google Cloud only provides one serverless database which is Firestore (or Datastore), a NoSQL document database. While Firestore is an excellent service that suits a range of use cases, if you want a serverless, relational SQL database off the shelf, you’re out of luck. This guide explains how to deploy an SQLite database on serverless infrastructure without leaving the free tier with the help of Cloud Run and Cloud Storage.
1 Overview
To run SQLite on Google Cloud, we’ll deploy a Python Flask app using a Cloud Run service with a Cloud Storage volume mount. The Cloud Storage volume mount will allow the SQLite database to persist beyond the destruction of the Cloud Run instance. The bottleneck in this approach is without a doubt Cloud Storage, but as we will see, it’s good enough for some smaller scale use cases, particularly ones with more reads than writes. Both services have very generous free tiers and so under normal usage, this guide shouldn’t cost anything unless you’re already using Cloud Run and Cloud Storage extensively and have moved beyond the free tier, and even then it shouldn’t be more than a few cents. Regardless, be sure to have billing alerts in Google Cloud in place and destroy the resources when you’re finished with them. This guide assumes you already have a GCP account and project and are familiar with enabling services.

SQLite
SQLite is a fast, easy to setup, self contained SQL database designed to be portable. It’s the most widely used database in the world and is found everywhere from mobile phones to car multimedia systems. One of the main benefits (and the primary reason for using it in this guide) is that the state of the database is stored in a single database file which is compatible across platforms.
Cloud Run
Cloud Run is a Google Cloud service for running containers without needing to manage the infrastructure. It comes in two flavours: services and jobs. Services are containers which respond to HTTP requests and are well suited to hosting web servers and API’s. Jobs perform a task to completion such as batch processing. Cloud Run is stateless and you pay only for what your container uses in memory and CPU. It also has a generous free tier which makes it even more attractive for getting started with.
Cloud Storage
Cloud Storage is Google Cloud’s object storage service. It’s cheap, severless, and can store enormous amounts of data easily. Cloud Storage is quick and easy to retrieve objects, but it’s optimised for quantity rather than high performance read and writes so it’s slower than other Google storage services like Filestore or Persistent Disk which are designed to provide storage for applications.
2 Creating the Flask App
For this guide, we’ll create a table in the SQLite database called “users” which simply has an auto incrementing ID, a name, and an age. The Flask app will expose two endpoints, one to get all users, and one to add a user.
To begin, create a directory for this project and a file called requirements.txt with the following dependencies:
flask==2.1.0
Werkzeug==2.2.2
SQLite is included in Python by default so is not added to the requirements file.
For the Flask app we’ll create a single called app.py and add the following Python to it:
from flask import Flask, jsonify, request
import sqlite3

app = Flask(__name__)

# Create a SQLite database and table
conn = sqlite3.connect('data/data.db')
cursor = conn.cursor()
cursor.execute('''
    CREATE TABLE IF NOT EXISTS users (
        id INTEGER PRIMARY KEY AUTOINCREMENT,
        name TEXT,
        age INTEGER
    )
''')
conn.commit()
conn.close()


# Endpoint to get all users
@app.route('/users', methods=['GET'])
def get_users():
    conn = sqlite3.connect('data/data.db')
    cursor = conn.cursor()
    cursor.execute('SELECT * FROM users')
    users = cursor.fetchall()
    conn.close()
    return jsonify({'users': users})

# Endpoint to add a user
@app.route('/add_user', methods=['POST'])
def add_user():
    try:
        # Get user data from the request
        user_data = request.get_json()
        name = user_data.get('name')
        age = user_data.get('age')

        # Validate user input
        if not name or not age:
            return jsonify({'error': 'Name and age are required'}), 400

        # Insert user into the database
        conn = sqlite3.connect('data/data.db')
        cursor = conn.cursor()
        cursor.execute('INSERT INTO users (name, age) VALUES (?, ?)', (name, age))
        conn.commit()
        conn.close()

        return jsonify({'message': 'User added successfully'}), 201

    except Exception as e:
        return jsonify({'error': str(e)}), 500


# Run the app
if __name__ == '__main__':
    app.run(debug=True)
Install the requirements with pip install -r requirements.txt (it’s recommended to use a Python virtual environment or Conda environment) and run the script with python app.py. This should start a Flask development server with output similar to the following:

The Flask app should be ready to receive requests now so send an HTTP GET request to http://127.0.0.1:5000/users (if your server has started on a different port to 5000, be sure to use that instead). The response currently should be an empty list of users because we haven’t added any yet.
{
    "users": []
}
To add a user, send an HTTP POST request to http://127.0.0.1:5000/add_user with the following content:
{
    "name": "Joe Blogs1",
    "age": 33
}
Here’s what it should look like using Postman:

Adding a user with Postman
Now that there’s a user in the database, you should be able to hit the users endpoint again and see the user you just added. Again here’s what it looks like using Postman:
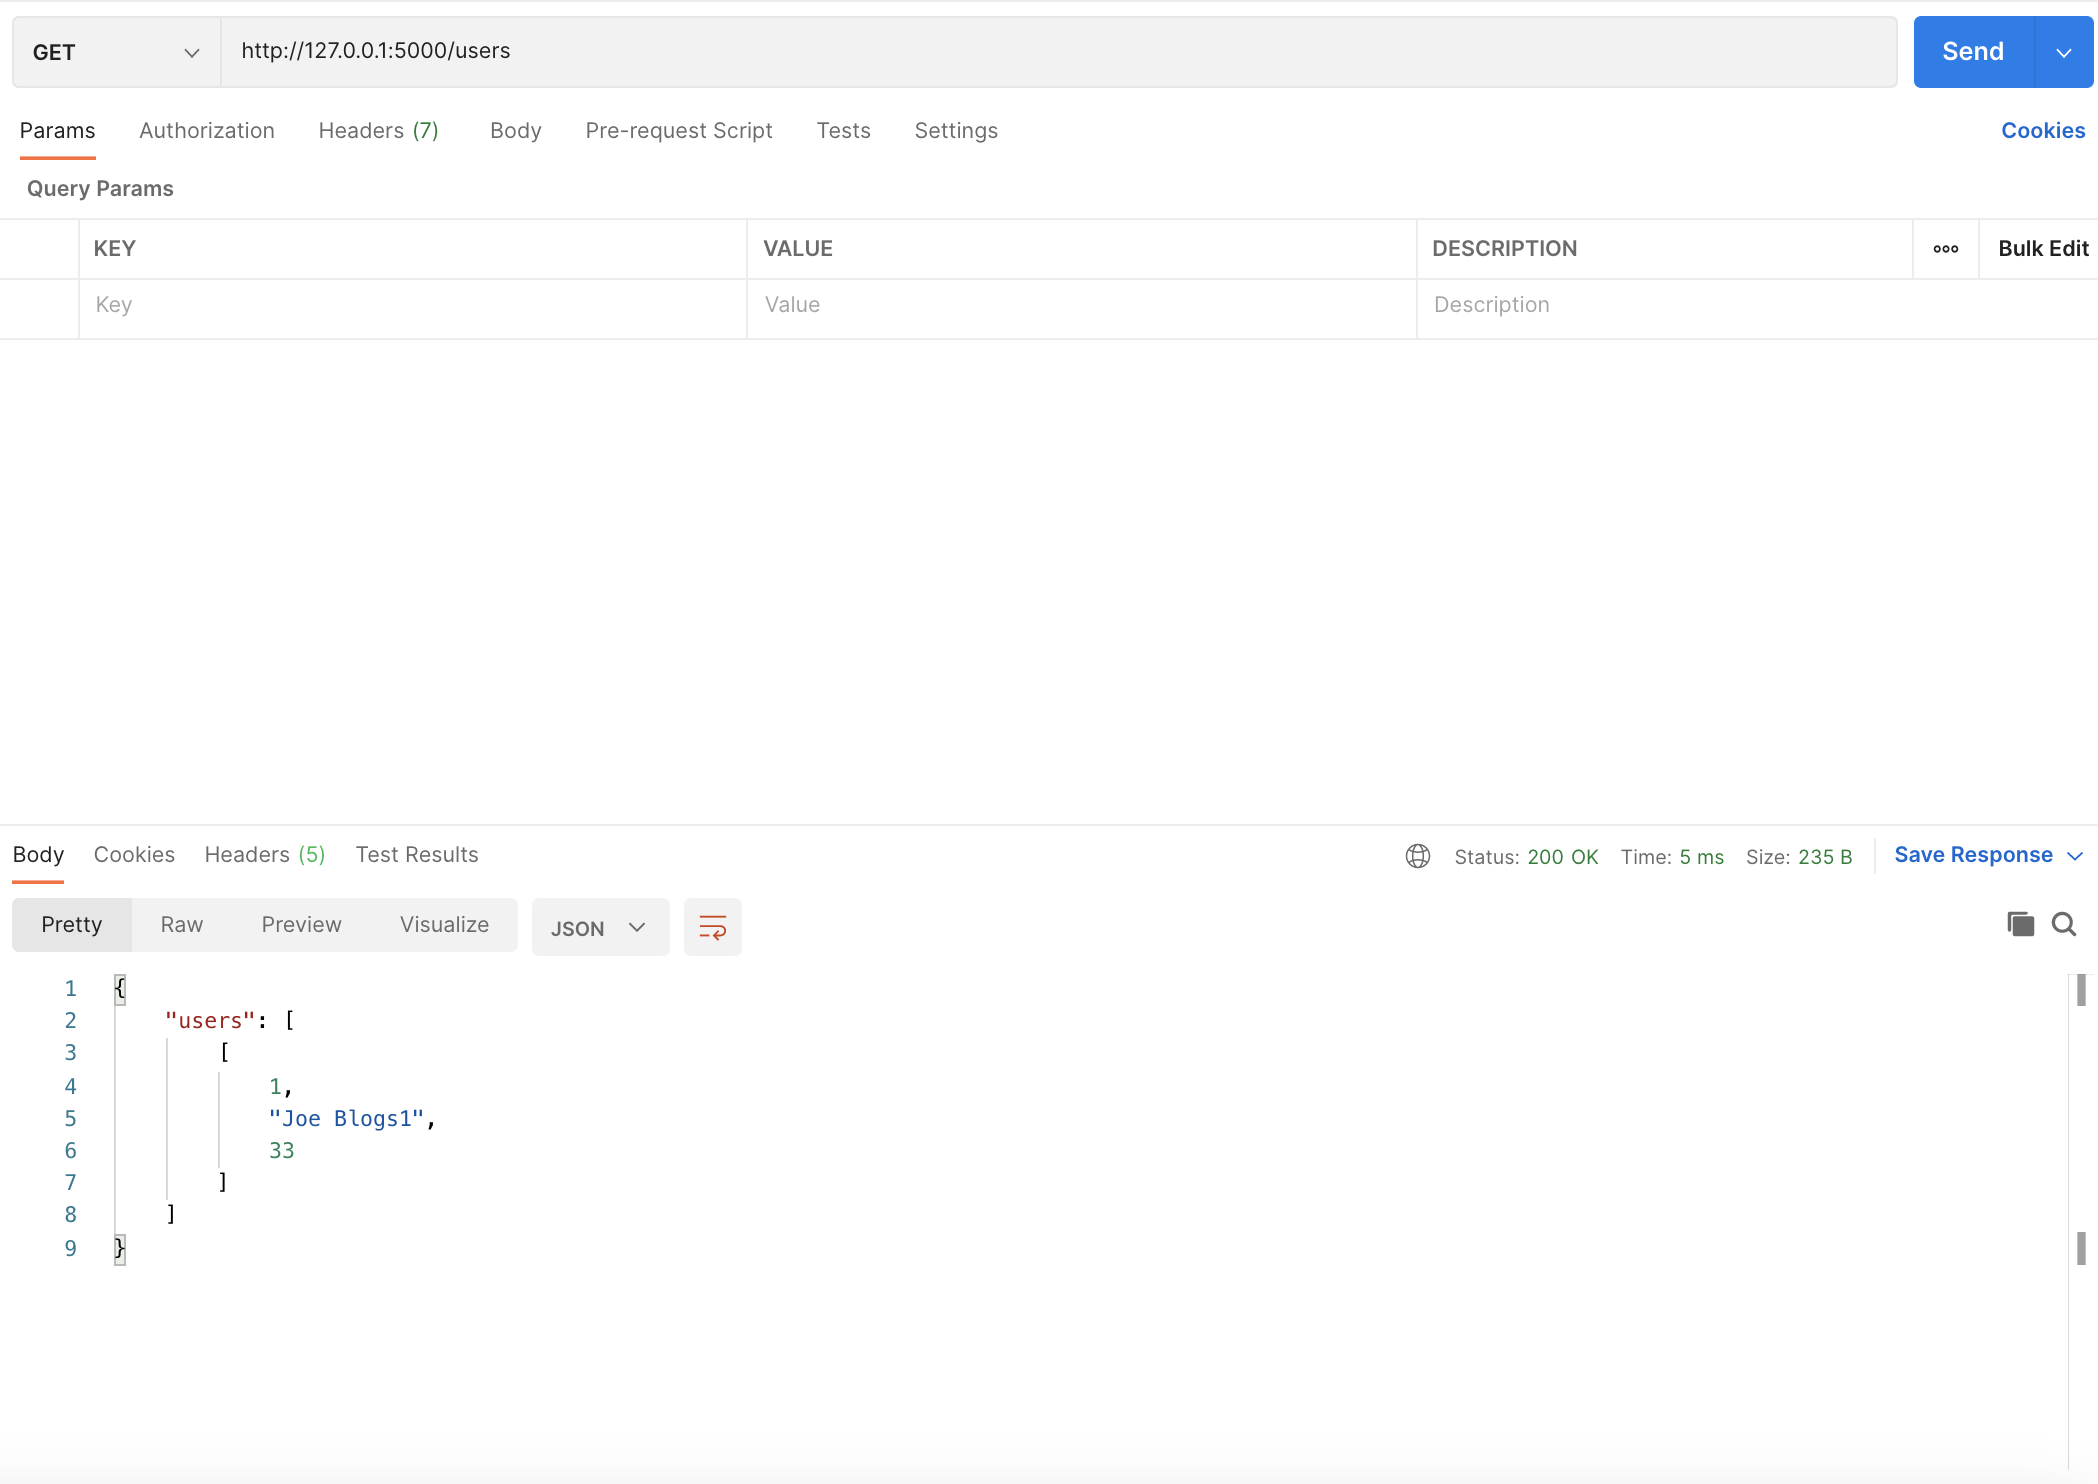
Getting users with Postman
If you were to stop the server now and restart it, a request to the users endpoint should still return the same result because the user has been persisted to disk. In your directory you should notice a /data directory has appeared and inside, a file called data.db. This is created by SQLite and will be important in the next section.
3 Deploying to Cloud Run
Build and Push Docker Container
Now that the Flask app has been tested locally, the next step is to deploy it to the cloud. Cloud Run runs a container so we’ll first need to build a Docker container of our app. Alongside app.py and requirements.txt in your directory, add a file called Dockerfile with the following contents:
# Use an official Python runtime as a parent image
FROM python:3.8-slim

# Set the working directory to /app
WORKDIR /app

# Copy the current directory contents into the container at /app
COPY . /app

# Install any needed packages specified in requirements.txt
RUN pip install --no-cache-dir -r requirements.txt

# Create a volume for the SQLite database
VOLUME /app/data

# Make port 5000 available to the world outside this container
EXPOSE 5000

# Run app.py when the container launches
CMD ["flask", "run", "--host=0.0.0.0", "--port=5000"]
To build the container you’ll need a containerisation tool like Docker Desktop so be sure to install that if you haven’t already. We’ll be using Docker Desktop for this guide.
Run the command docker build -t <YOUR-REGION>-docker.pkg.dev/<YOUR-PROJECT-ID>/<YOUR-REPOSITORY>/flask-sqlite-api:latest . to build the image and tag it in preparation for pushing to Google Artifact Registry where it will be pulled by Cloud Run. Follow this up with a docker push docker push <YOUR-REGION>-docker.pkg.dev/<YOUR-PROJECT-ID>/<YOUR-REPOSITORY>/flask-sqlite-api:latest.
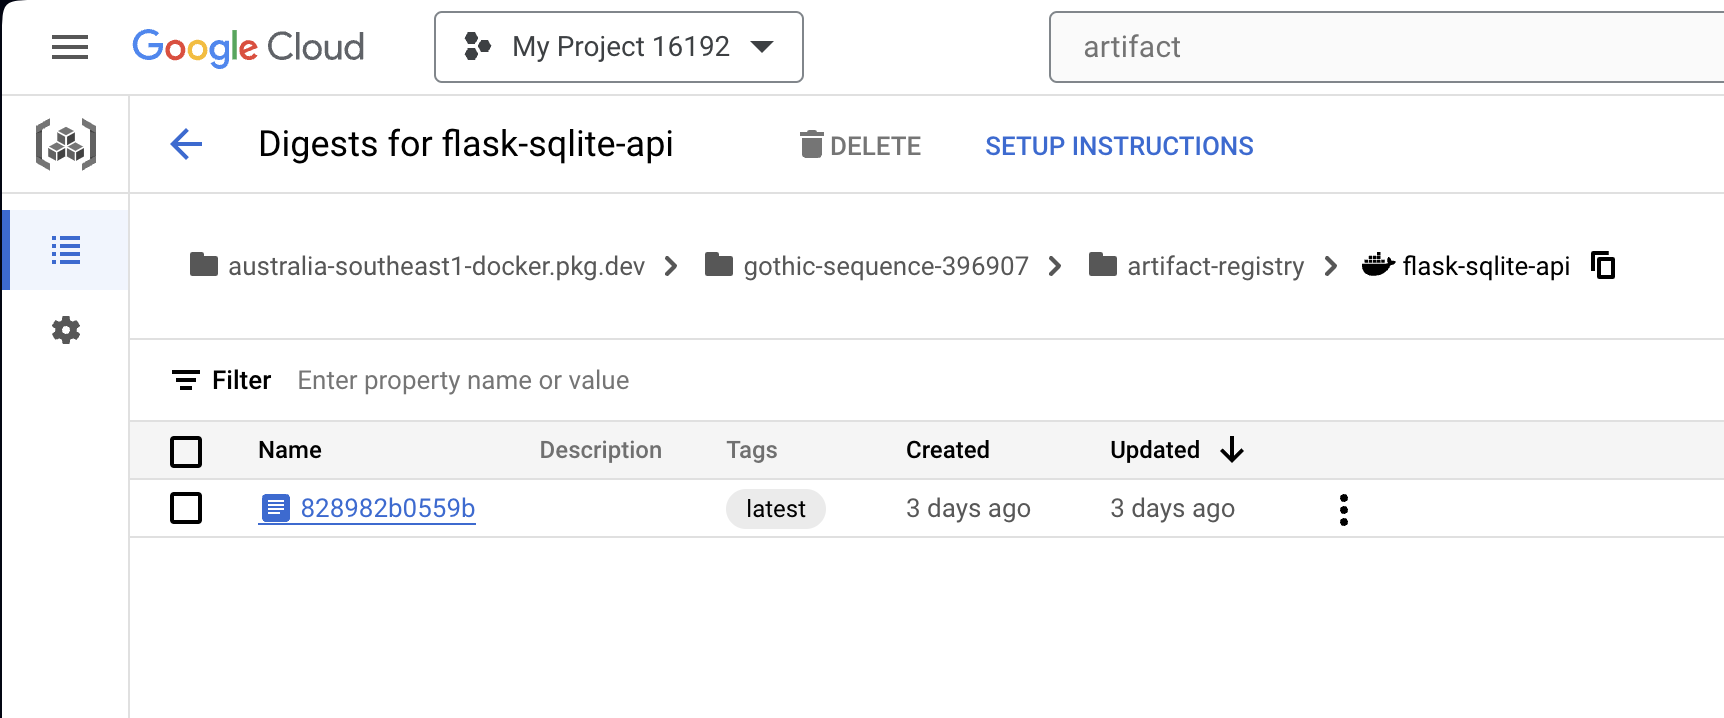
The image should be visible in Artifact Registry in the Cloud Console
Create Cloud Storage Bucket
In order for the database state to be persisted beyond the life of the Cloud Run instance, a Cloud Storage bucket needs to be created to store the database file. To do this, run the following gcloud command:
gcloud storage buckets create gs://<YOUR-BUCKET-NAME> --project=<YOUR-PROJECT-ID> --location=<YOUR-REGION>
Note: it’s well worth keeping each of these resources in the same GCP region and the closest one to where you’re located. Having the bucket in the US and the Cloud Run service in Australia would add a fairly significant amount of latency for example.
Deploy the Cloud Run Service
The Cloud Run service is deployed with a Cloud Storage volume mount which allows it to use a Cloud Storage bucket like a file system. This feature is in preview currently and requires the second generation Cloud Run execution environment. For more information on Cloud Storage volume mounts see here.
To deploy the service using the image you pushed and the bucket you created in previous steps, run the following gcloud command:
gcloud beta run deploy sqlite-test
                    --image <YOUR-REGION>-docker.pkg.dev/<YOUR-PROJECT-ID>/<YOUR-REPOSITORY>/flask-sqlite-api:latest --add-volume=name=sqlite-test,type=cloud-storage,bucket=<YOUR-BUCKET-NAME>
                    --add-volume-mount=volume=sqlite-test,mount-path=/app/data
                    --execution-environment=gen2
                    --port=5000
All going well, the service should deploy and should be visible in the Cloud Console.
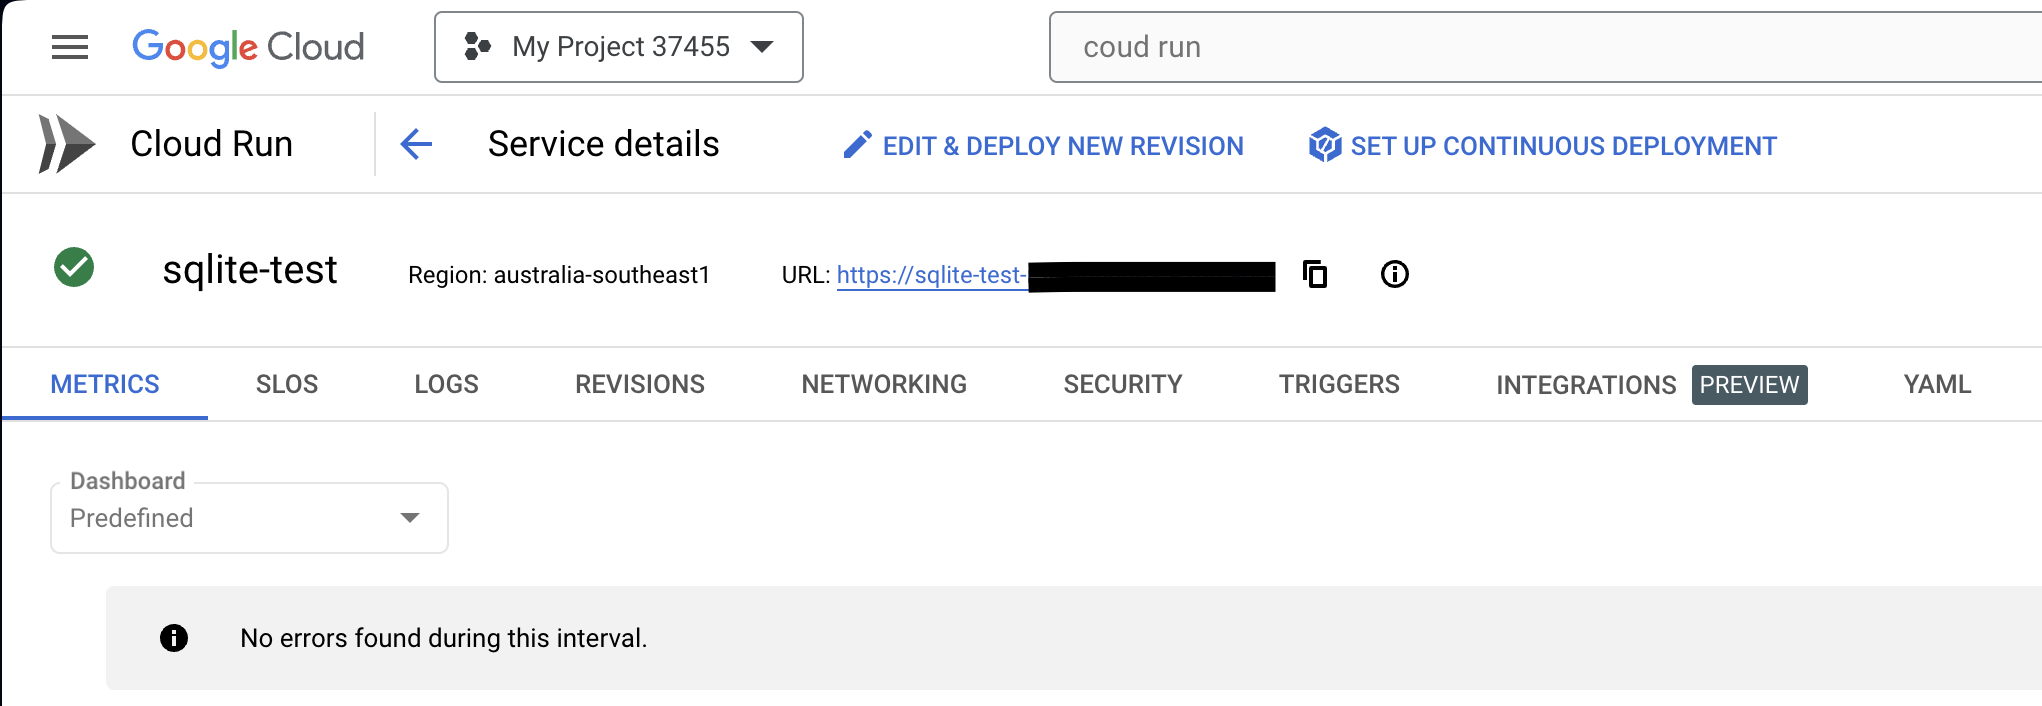
Copy the URL of the service. Mine is partially covered because at this point it is configured by default to allow unauthenticated requests which means anyone on the Internet could reach it if they knew the URL! When you are finished with this guide be sure to remove the service or change the authentication options under the “Security” tab to require authentication.
Using the URL you copied, send HTTP requests to the service as you did while testing locally, except replace http://127.0.0.1:5000 with the URL of your Cloud Run service. You’ll notice the first request is quite slow. This is because Cloud Run is starting an instance to handle your request. Subsequent requests are faster.
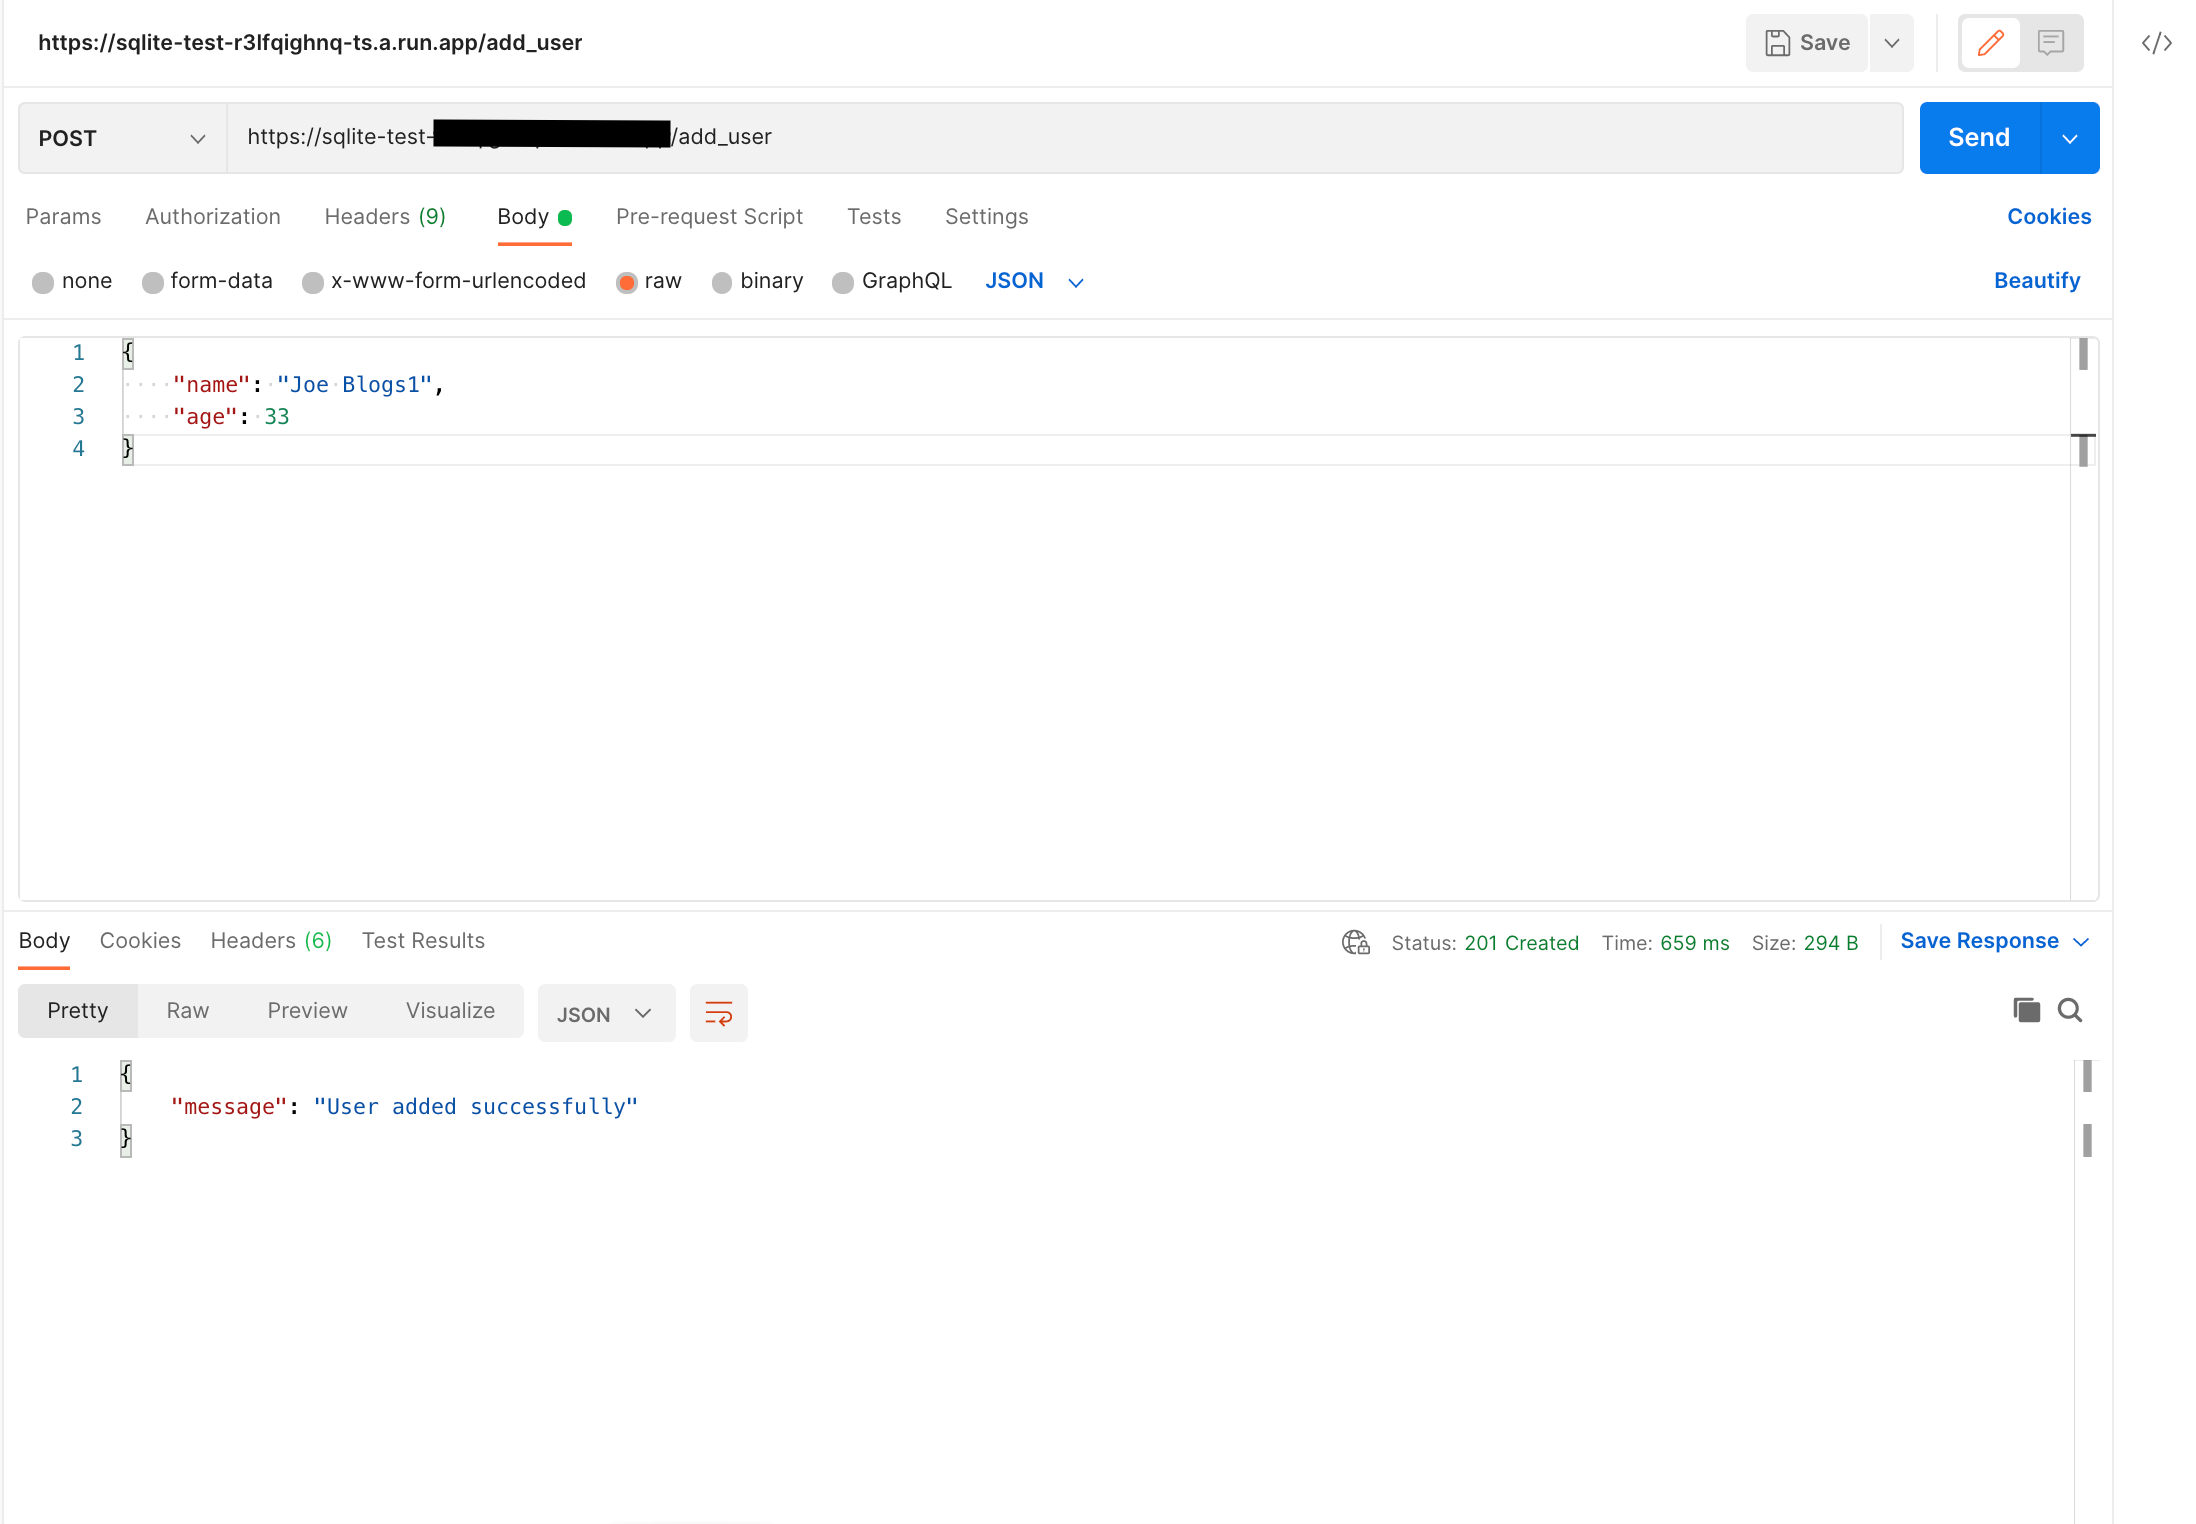
Adding a user using the Cloud Run service
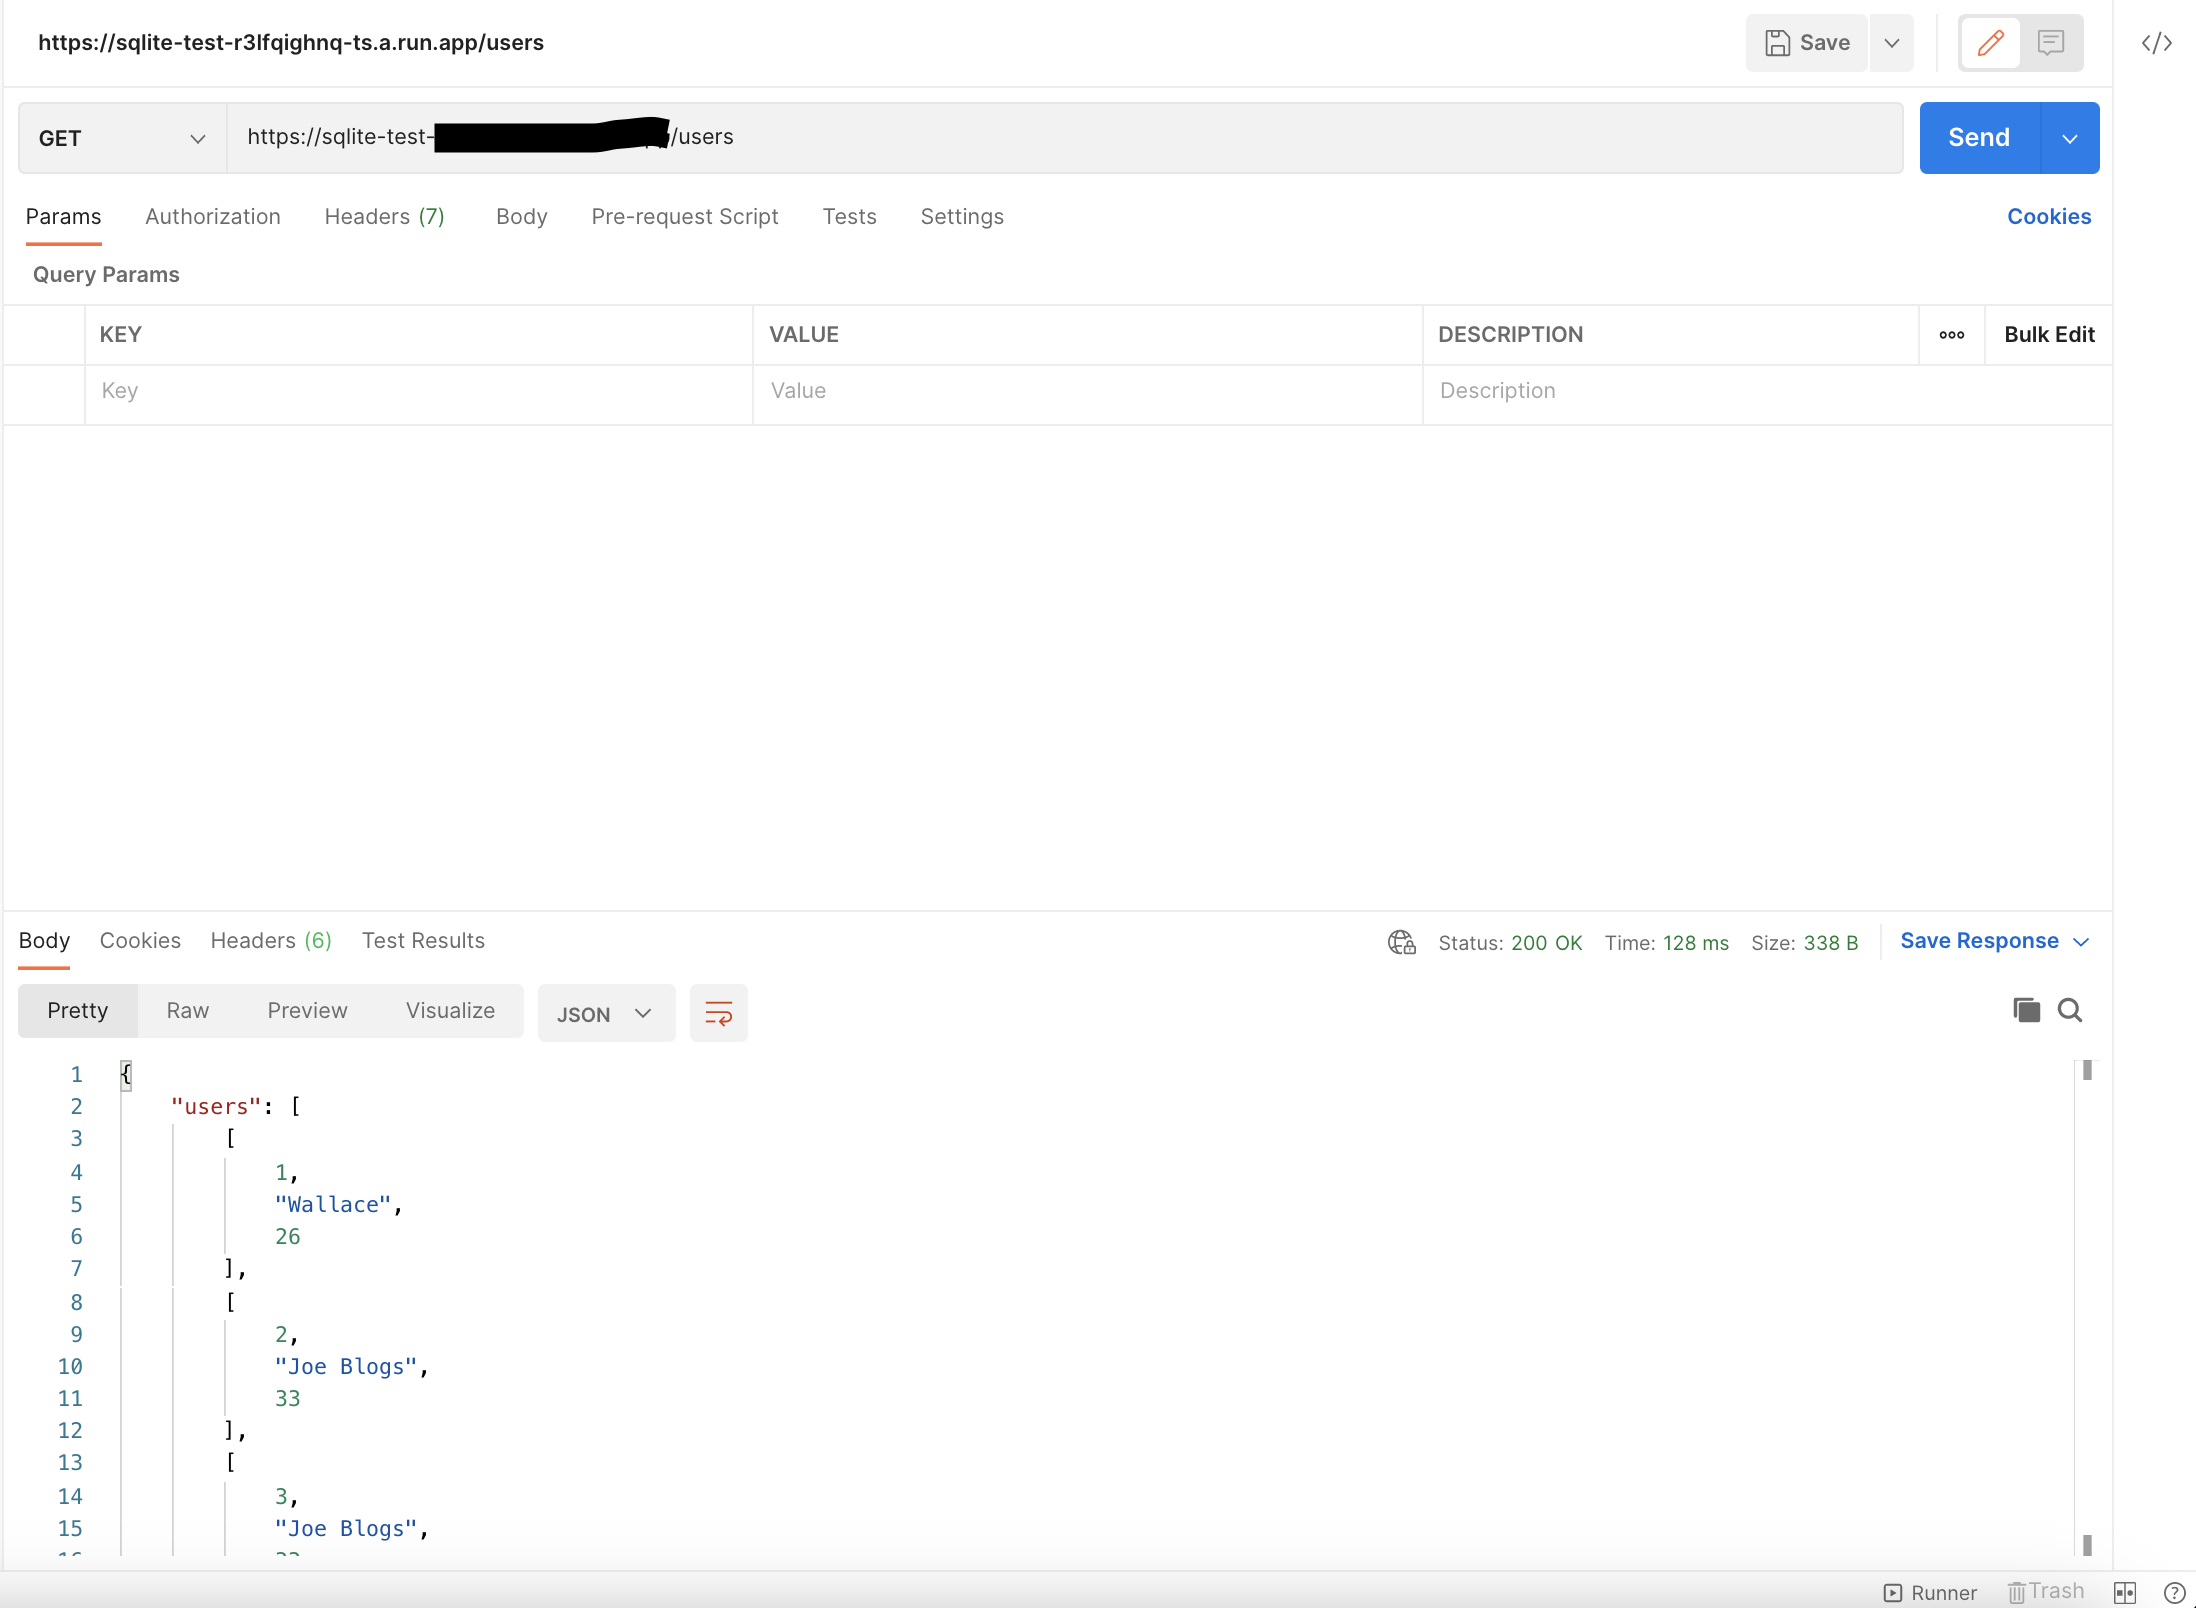
Getting users using the Cloud Run service
You should also notice that adding a user is a lot slower than getting the users. This is due to the overhead of writing to Cloud Storage. For that reason, deploying SQLite on Cloud Run with Cloud Storage is more suited to cases without frequent writes or where fast writes are not required.
4. Pros and Cons
This guide has shown that it’s entirely possible to deploy a cheap, SQL database in Google Cloud using serverless infrastructure. This is suitable for use cases where you’d rather not spend $20 a month to run Cloud SQL, you’re dealing with few (if any) writes to the data, and you don’t need very fast latency for reads.
As with any solution, there are some caveats and drawbacks. A major one is that Cloud Run uses Cloud Storage FUSE for the volume mount which has the limitation of not providing any file locking. This means if your app receives two requests to add a user at the same time, when SQLite writes to the database file, the latter insert could overwrite the earlier one. To avoid this, you’d need to limit your Cloud Run service’s scaling to a single instance and ensure your app handles requests synchronously. The other drawback is performance, however for reads while testing, I achieved about 130ms consistently which is not terrible. I haven’t tested with more data or complex queries, but SQLite itself is fast, it’s the latency between Cloud Storage and Cloud Run which is the bottleneck, so I expect it to not be a major issue.
5. Conclusion
In this guide we’ve written a Python Flask app which exposes an API backed by SQLite and deployed it using Cloud Run and Cloud Storage. This is a very cheap approach to hosting an SQL database using serverless infrastructure on Google Cloud (mostly free vs $20+ a month) with adequate performance for smaller scale use cases. As with anything however, the principle of “you get what you pay for” applies. In this case you pay nothing and get a simple database suitable for small scale projects, but if you’re building a low latency trading platform, my advice would be to splash out for a more suitable service!
As a personal project I’m working on a website called House Pricer which serves house price predictions for 180k houses in my city Christchurch, New Zealand. Currently the data is stored in Firestore and BigQuery, but I’m considering attempting to incorporate Cloud Run hosted SQLite in some capacity so stay tuned for an article on this!
If you had any issues with this guide or have any feedback or questions, feel free to contact me at wallace.sharpedavidson@gmail.com