Secure Cloud Run With Auth0 and Workforce Identity Federation
Hosting in the cloud securely can feel daunting. Acronyms like JWT and OIDC blur together, and developers constantly worry: will someone steal my credentials? Will I wake up to a six-figure invoice from a faceless cloud provider? Fortunately, if you’re on Google Cloud, tools like Cloud Run, Identity-Aware Proxy (IAP), and Workforce Identity Federation make secure hosting both simple and affordable. In this post, we’ll walk through deploying a secure website on Cloud Run with Auth0 authentication, powered by IAP and Workforce Identity Federation: all within the free tier.
What is Workforce Identity Federation?
Workforce Identity Federation allows you to authenticate users to Google Cloud resources using your existing identity provider (IdP). Instead of managing separate Google credentials, users sign in through the IdP you already use. In our case, that IdP is Auth0.
What is Identity-Aware Proxy (IAP)?
Identity-Aware Proxy (IAP) acts as a gatekeeper in front of your applications and services on Google Cloud. Instead of leaving your app open to the internet, IAP ensures that only authenticated and authorized users can reach it. When someone tries to access your app, IAP checks their identity against your configured identity provider before letting them through. In this post, IAP will sit in front of our Cloud Run service to enforce authentication with Auth0.
Architecture Overview
In this example, I’ll show how I host a budgeting website that my wife and I can access securely to monitor our spending. Instead of creating separate Google Workspace accounts, we both log in through Auth0, which acts as our identity provider. Behind the scenes, Google Cloud services handle the rest:
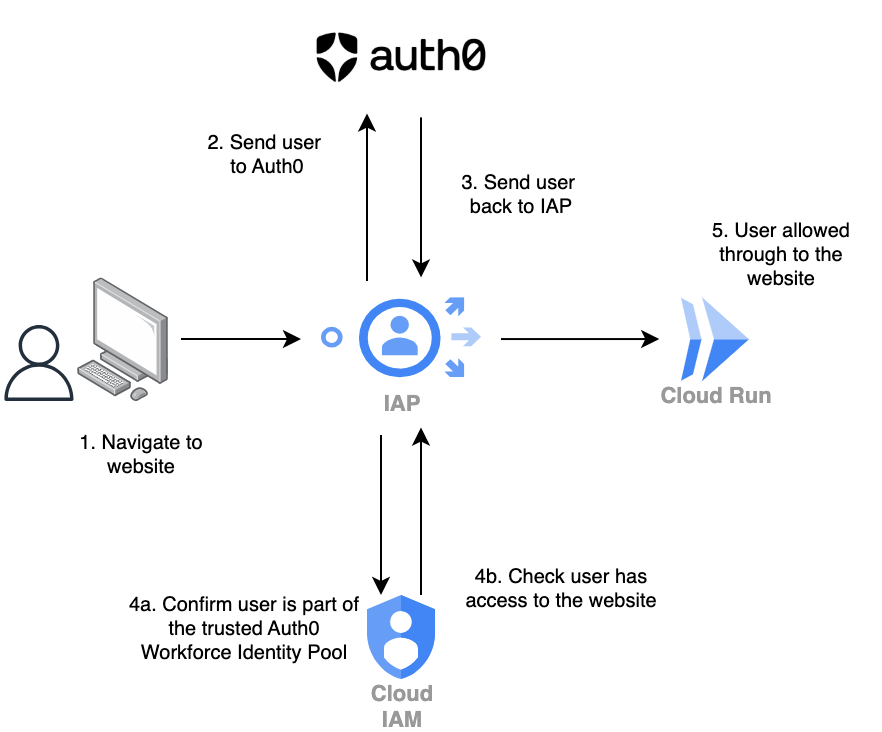
High level flow.
- Auth0: External identity provider where my wife and I have logins.
- Workforce Identity Federation: Maps our Auth0 identities into Google Cloud.
- Identity-Aware Proxy (IAP): Enforces that only authenticated users (us) can access the budgeting site.
- Cloud Run: Runs the containerised budgeting website.
Step 1: Deploy the website
The first step is to deploy a containerised website as a Cloud Run Service.
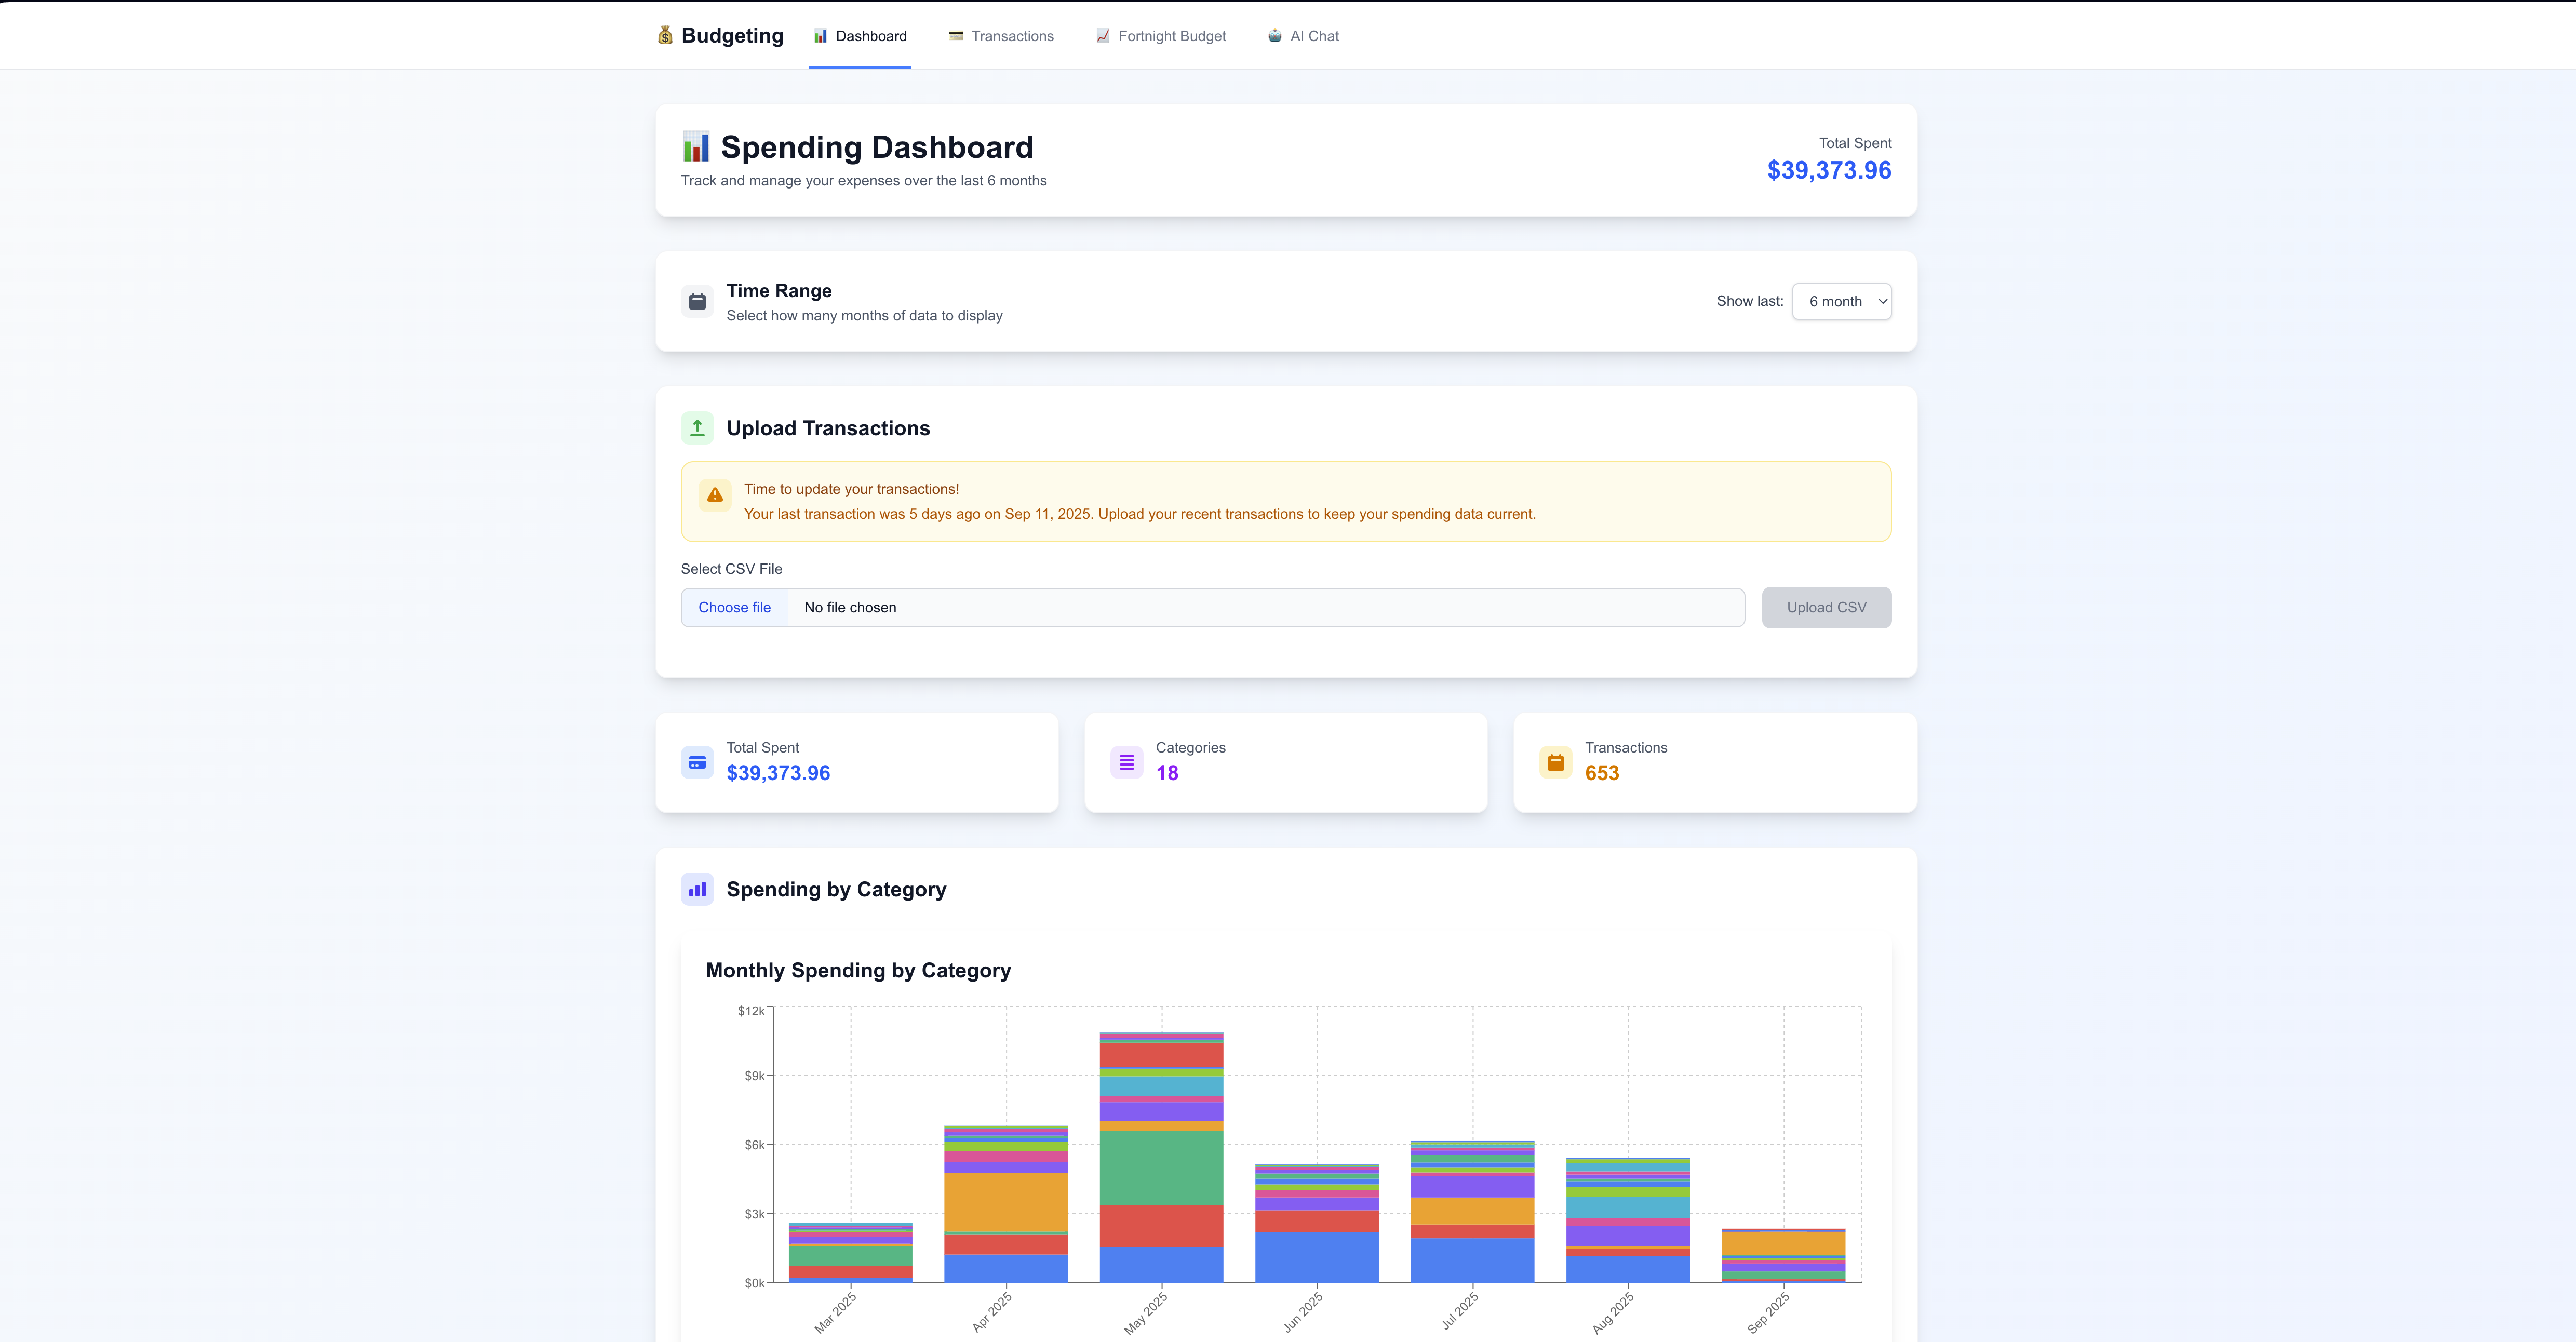
Simple budgeting web app to get insights into our spending.
In this post, we’ll be writing Terraform to provision the Google Cloud resources. This allows the resources to be destroyed at the end to keep things tidy.
The following Terraform creates a Cloud Run service running an image called budgeting from an Artifact Registry. The Cloud Run service is using Google’s new native IAP integration which means you don’t need your own load balancer. Apply it with terraform apply.
resource "google_cloud_run_v2_service" "budget_website" {
  provider     = google-beta # Required to use Cloud Run's native IAP integration
  name         = "budgeting"
  location     = "australia-southeast1"
  project      = "<PROJECT_ID>"
  ingress      = "INGRESS_TRAFFIC_ALL"
  launch_stage = "BETA" # Required to use Cloud Run's native IAP integration
  iap_enabled  = true # Required to use Cloud Run's native IAP integration

  template {
    service_account = google_service_account.service_account.email

    containers {
      image = "australia-southeast1-docker.pkg.dev/<PROJECT_ID>/<ARTIFACT-REGISTRY>/budgeting:latest"
    }
  }
}

resource "google_cloud_run_v2_service_iam_member" "iap_invoker" {
  location = google_cloud_run_v2_service.budget_website.location
  project  = google_cloud_run_v2_service.budget_website.project
  name     = google_cloud_run_v2_service.budget_website.name
  role     = "roles/run.invoker"
  member   = "serviceAccount:service-<PROJECT-NUMBER>@gcp-sa-iap.iam.gserviceaccount.com"
}

resource "google_service_account" "service_account" {
  account_id   = "budgeting"
  project      = "<PROJECT_ID>"
  display_name = "budgeting"
}
Once the Terraform applies, navigate to the Google Cloud Console to confirm the Cloud Run service is running and note the URL. It should look something like https://budgeting-<PROJECT-NUMBER>.australia-southeast1.run.app. This will be needed when configuring Auth0.
If you were to navigate to the new URL, IAP would send you to the Google login page (after which you’d get an IAP permission denied page as we haven’t granted access to the Cloud Run service yet). We want IAP to instead send you to Auth0 to login.
Step 2: Configure Auth0 as Identity Provider
To configure Auth0 to be an Identity Provider and map Auth0 users with Workforce Identity Federation, we need an Auth0 application.
Create an Application in Auth0
- Navigate to your Auth0 Dashboard
- Go to Applications → Create Application
- Choose Single Page Web Application
- Name it something like “Budgeting”
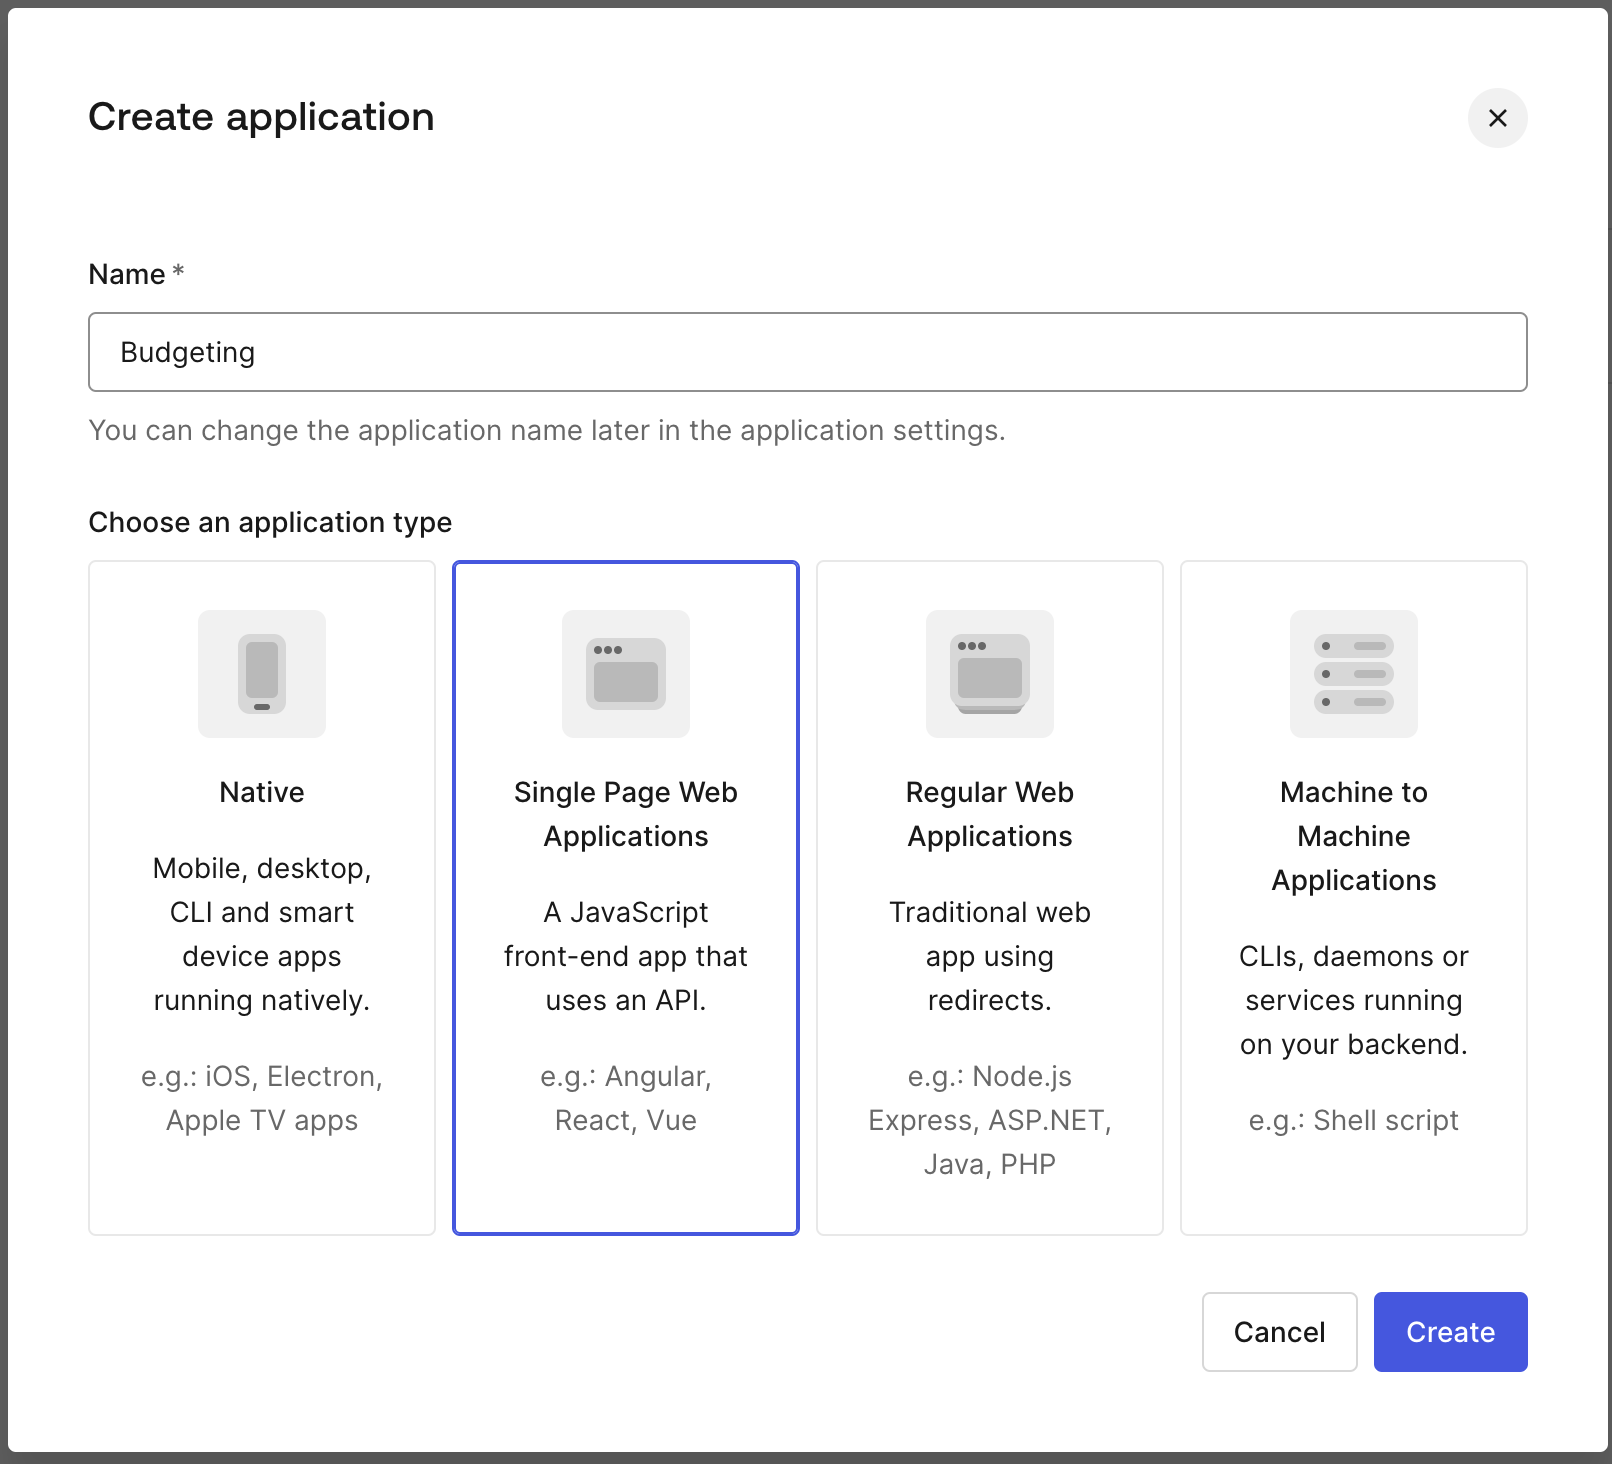
Create Auth0 Application.
- Once your Auth0 application is created, under the settings tab you’ll find a domain, a client ID, and a client secret. Note all three of these for later.
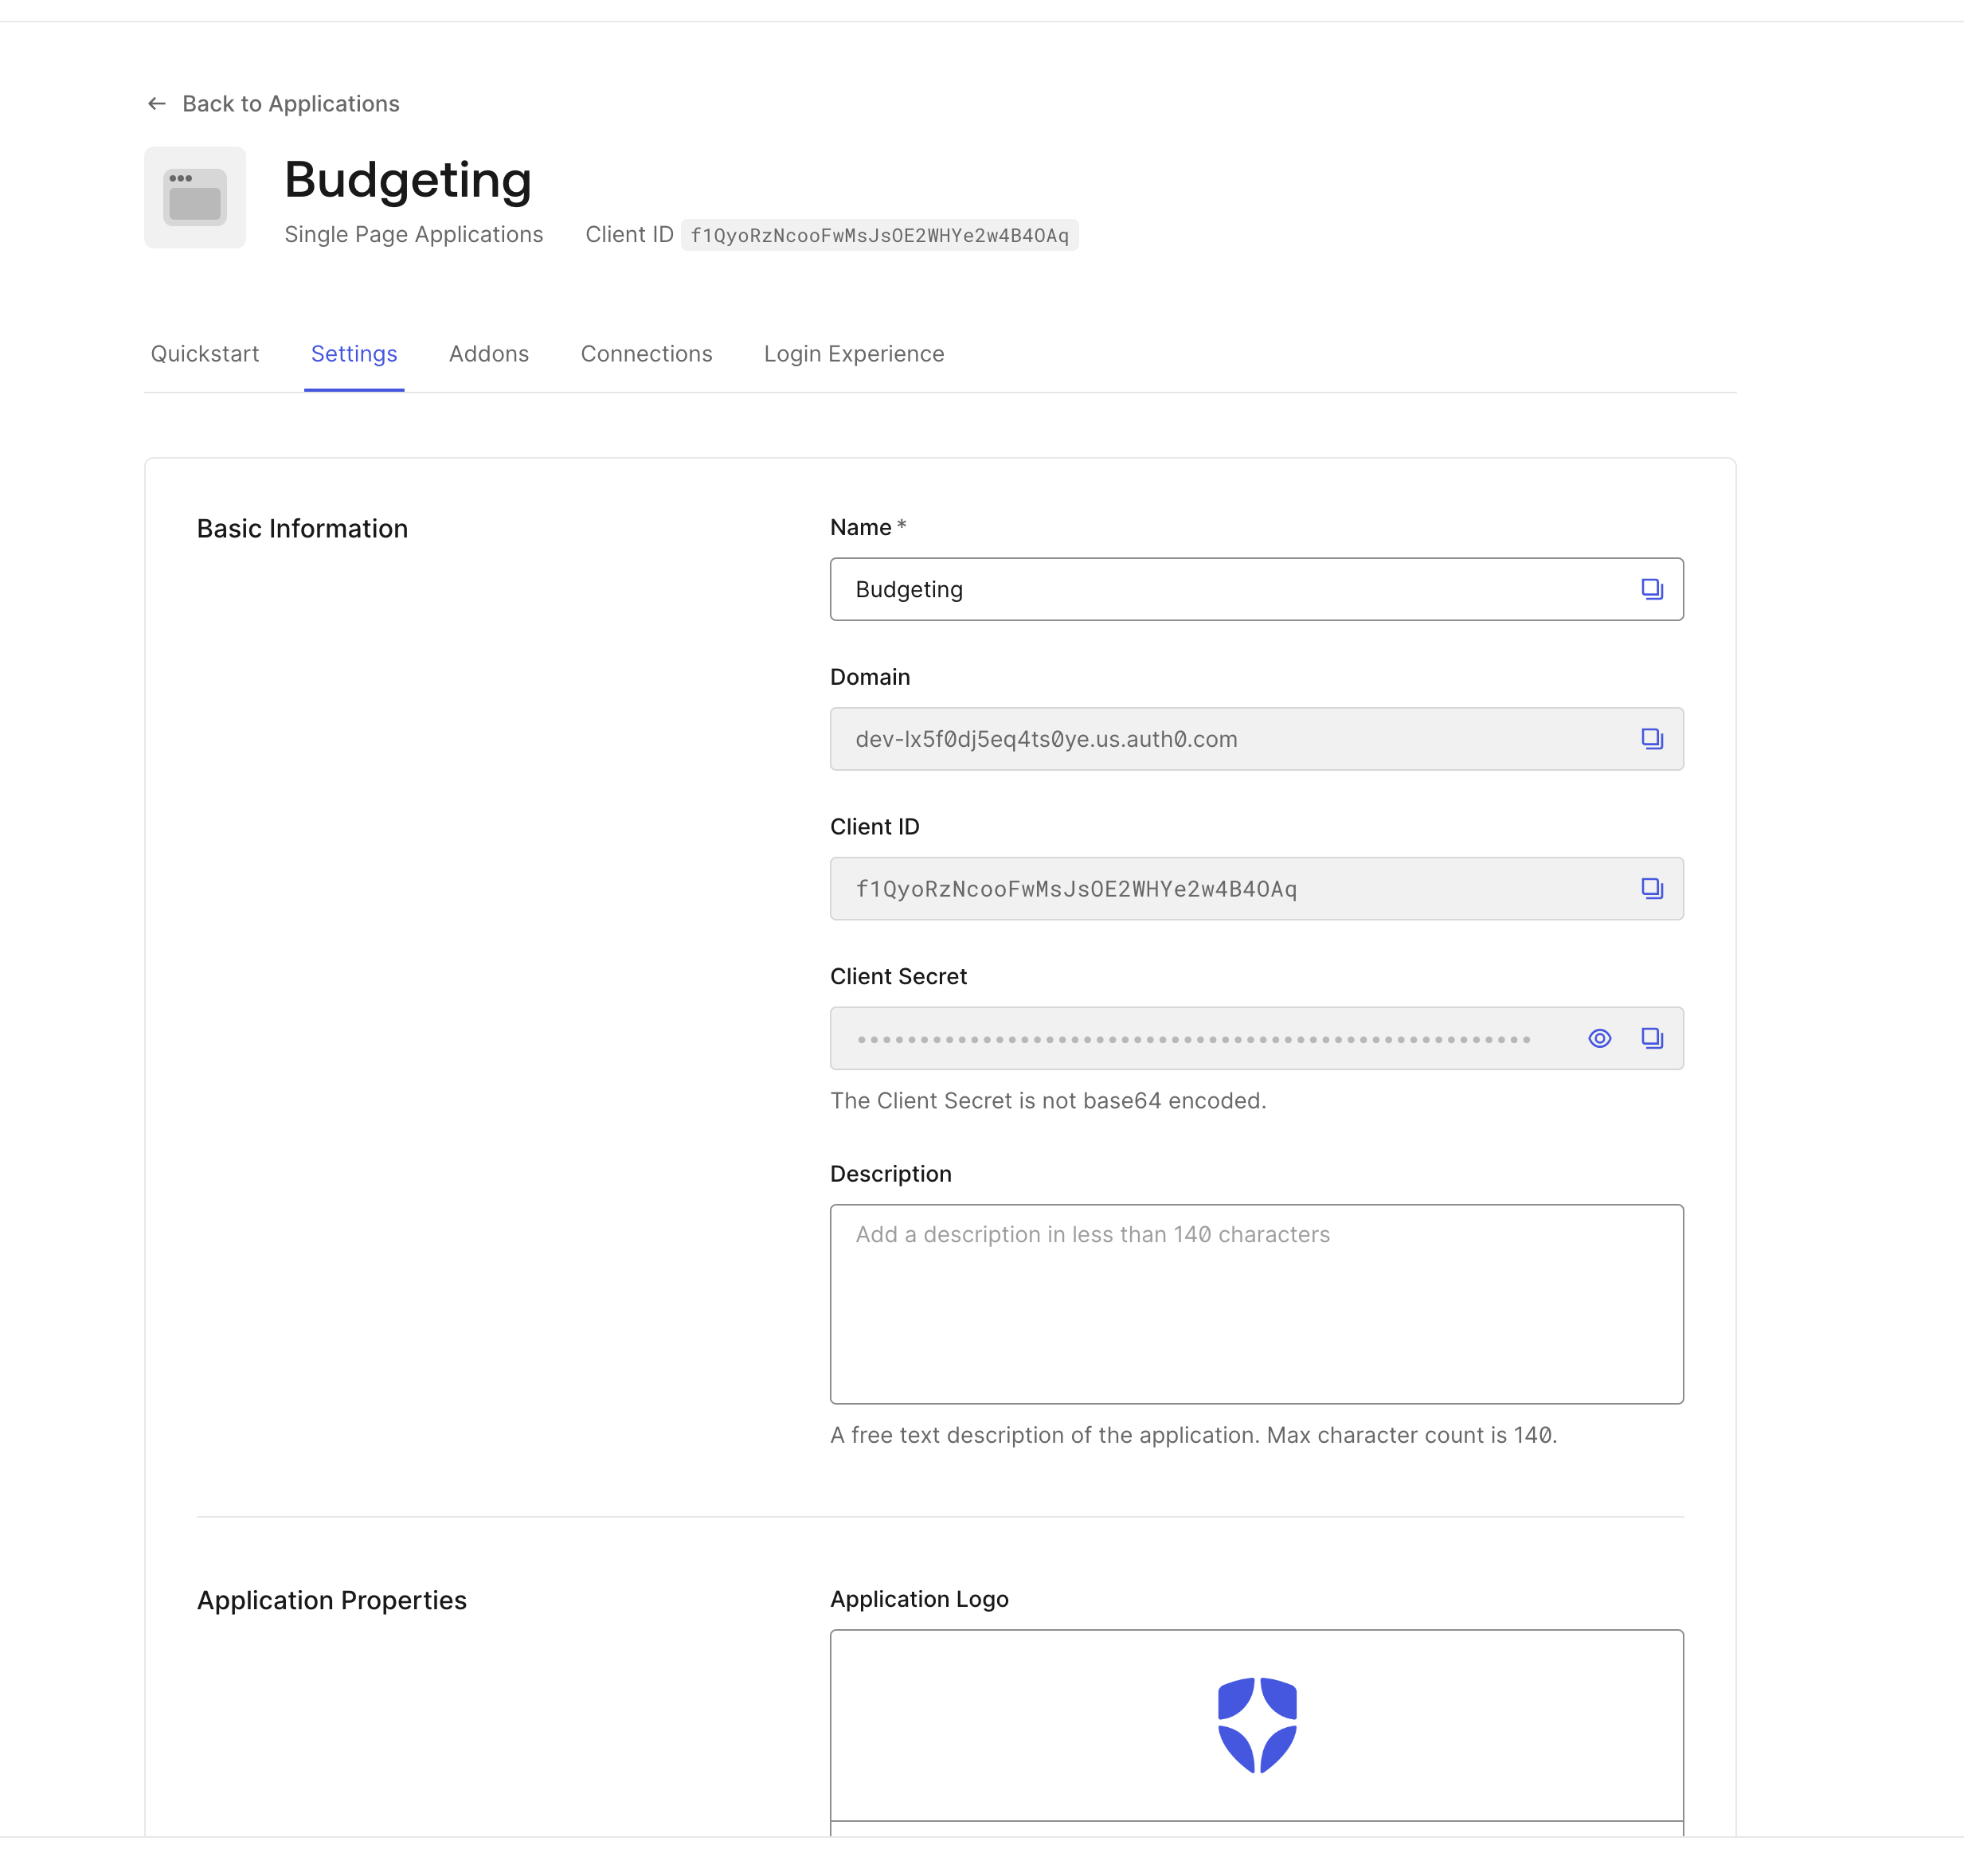
Note the domain, client ID, and client secret.
- Using your Cloud Run URL from earlier, add this to the Application Login URI and the Allowed Web Origins. The Allowed Callback URLs we will populate once we create the Workforce Identity Federation pool and provider in the next section.
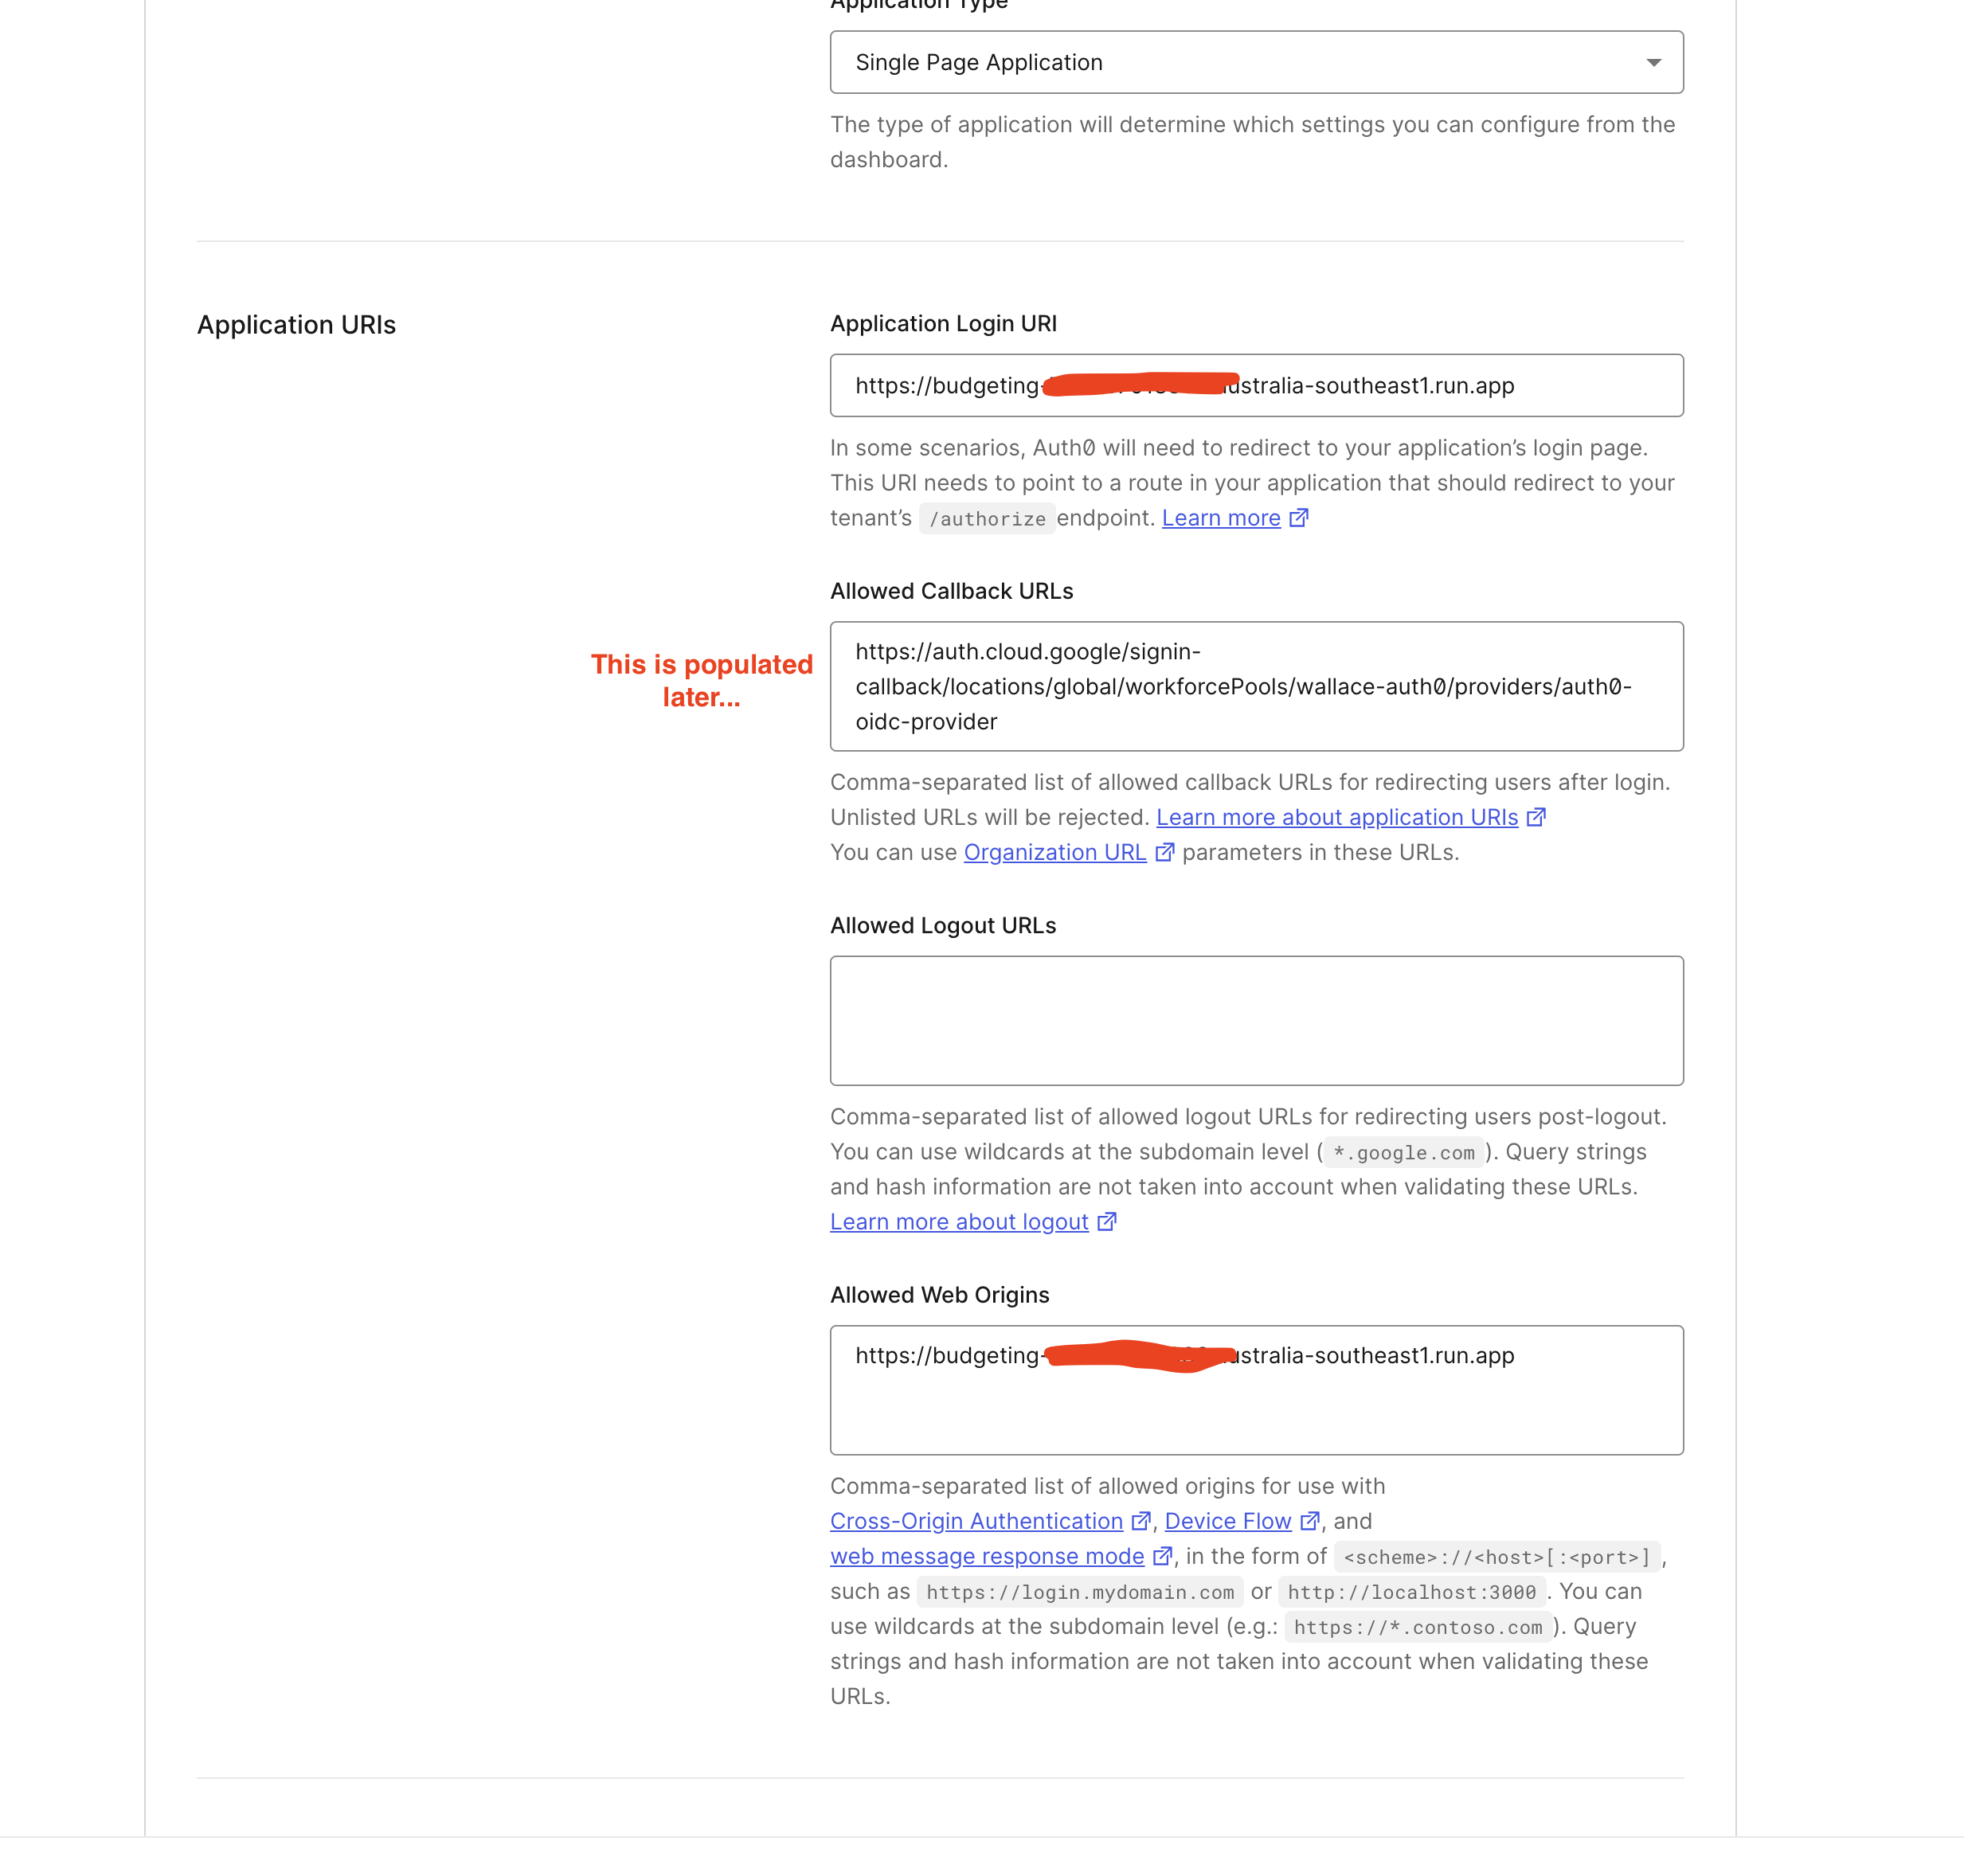
Update Login URL and Allowed Origins.
So far you have a website hosted as a Cloud Run service protected using Cloud Run’s native IAP integration and an Auth0 application. The next step is to link the two so that IAP makes your users sign in with Auth0.
Step 3: Create Workforce Identity Pool and provider
The following Terraform creates a Workforce Identity Federation pool called wallace-auth0 (name yours appropriately!) and a provider called auth0-oidc-provider. This provider is configured with your Auth0 domain as the issuer URI (so Google can fetch Auth0’s public keys to validate tokens), and the client ID and client secret for your Auth0 application. We need the client ID and client secret because we’re using the OIDC authorization code flow (response_type = "CODE").
With code flow, Google receives an authorisation code from Auth0 after your user signs in, then exchanges it for tokens directly with Auth0 in a backend call. That’s why Google needs the secret: it has to authenticate itself when making that exchange.
If you were to configure implicit flow instead, Auth0 would return the ID token directly in the browser redirect, meaning no client secret is needed. However, implicit flow is considered less secure (tokens pass through the browser) and limited by URL length, so code flow is strongly recommended for production use.
resource "google_iam_workforce_pool" "auth0_pool" {
  workforce_pool_id = "wallace-auth0"
  display_name      = "wallace-auth0"
  parent            = "organizations/<ORG_ID>"
  location          = "global"
}

resource "google_iam_workforce_pool_provider" "auth0_provider" {
  workforce_pool_id = google_iam_workforce_pool.auth0_pool.workforce_pool_id
  location          = google_iam_workforce_pool.auth0_pool.location
  provider_id       = "auth0-oidc-provider"
  display_name      = "auth0-oidc-provider"
  attribute_mapping = {
    "google.subject" = "assertion.sub"
  }
  oidc {
    issuer_uri = "https://<AUTH0_DOMAIN>"
    client_id  = "<AUTH0_CLIENT_ID>"
    client_secret {
      value {
        plain_text = "<AUTH0_CLIENT_SECRET>"
      }
    }
    web_sso_config {
      response_type             = "CODE"
      assertion_claims_behavior = "MERGE_USER_INFO_OVER_ID_TOKEN_CLAIMS"
    }
  }
}
The other point to note is the attribute mapping. This tells Google which claim (a piece of information about the user that is packaged inside the token) from the Auth0 ID token should be used as the unique identity for the user. In the example:
attribute_mapping = {
  "google.subject" = "assertion.sub"
}
- assertion.sub is the standard OIDC subject claim (a unique identifier for the user in Auth0).
- google.subject is the required claim in Google’s side that Workforce Identity Federation uses to establish the Google principal.
You can also map additional claims such as email or groups if you want additional access controls (you almost certainly would want to check the user was in a specific group in an enterprise setting for example), but in my example my Auth0 tenant only has two users.
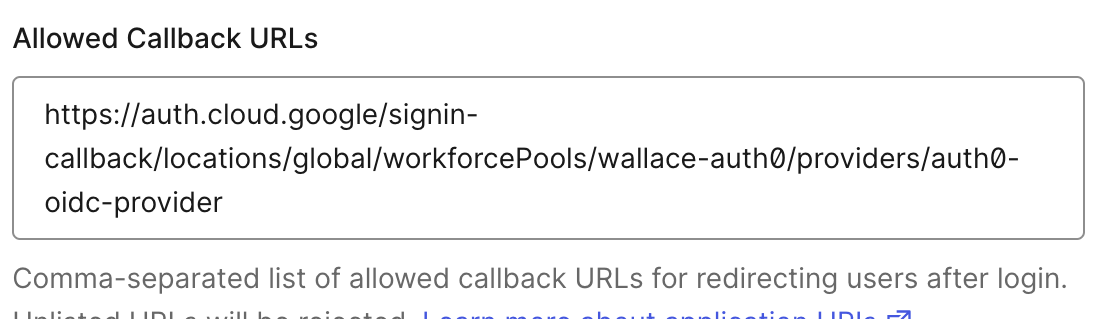
Now that we have our Workforce Identity Federation pool and provider, go back to your Auth0 application and populate the Allowed Callback URLs with https://auth.cloud.google/signin-callback/locations/global/workforcePools/wallace-auth0/providers/auth0-oidc-provider (alter with the name of your pool and provider).
Enter your Workforce Identity Provider name callback URL
At this point to prove Workforce Identity Federation is setup correctly, you should be able to sign into the federated Google Cloud Console. Following that link you should see a page prompting you for your Workforce Identity Federation provider name, in our case locations/global/workforcePools/wallace-auth0/providers/auth0-oidc-provider.
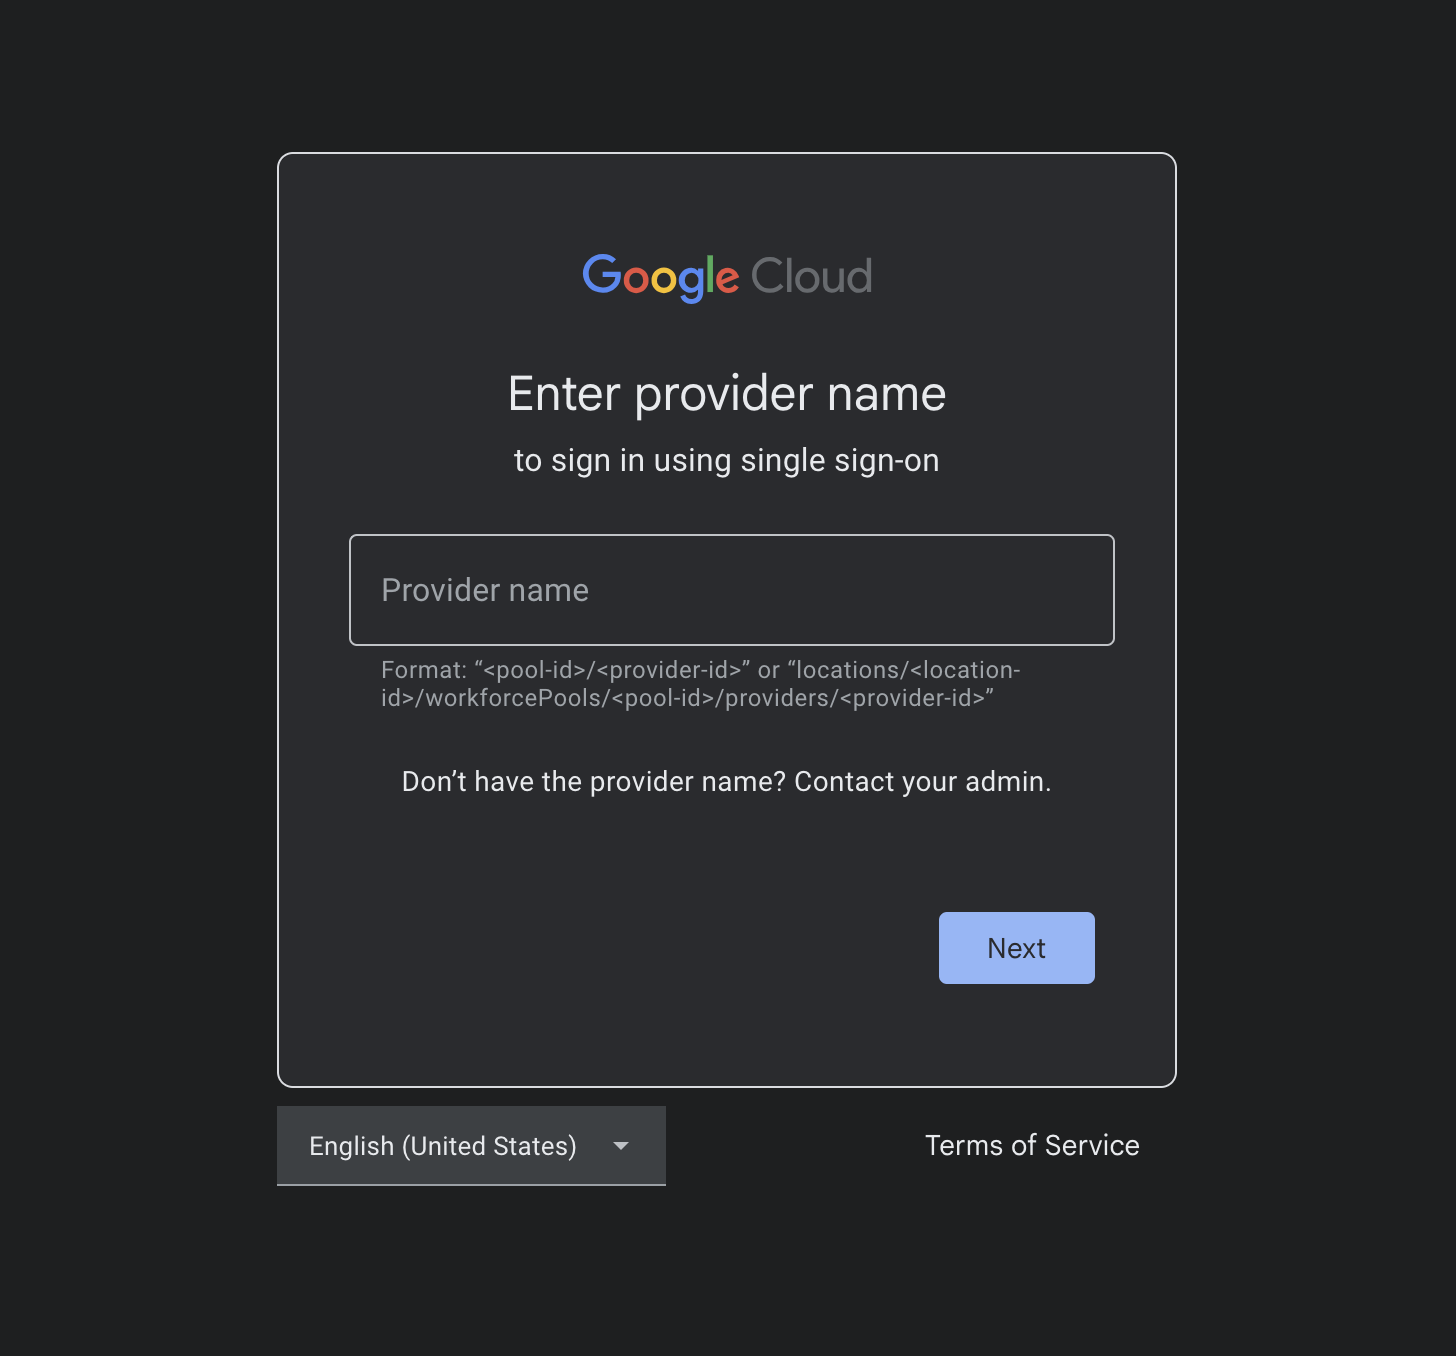
Enter your Workforce Identity Provider name.
Entering your provider name, you’ll be directed to the Auth0 login page.
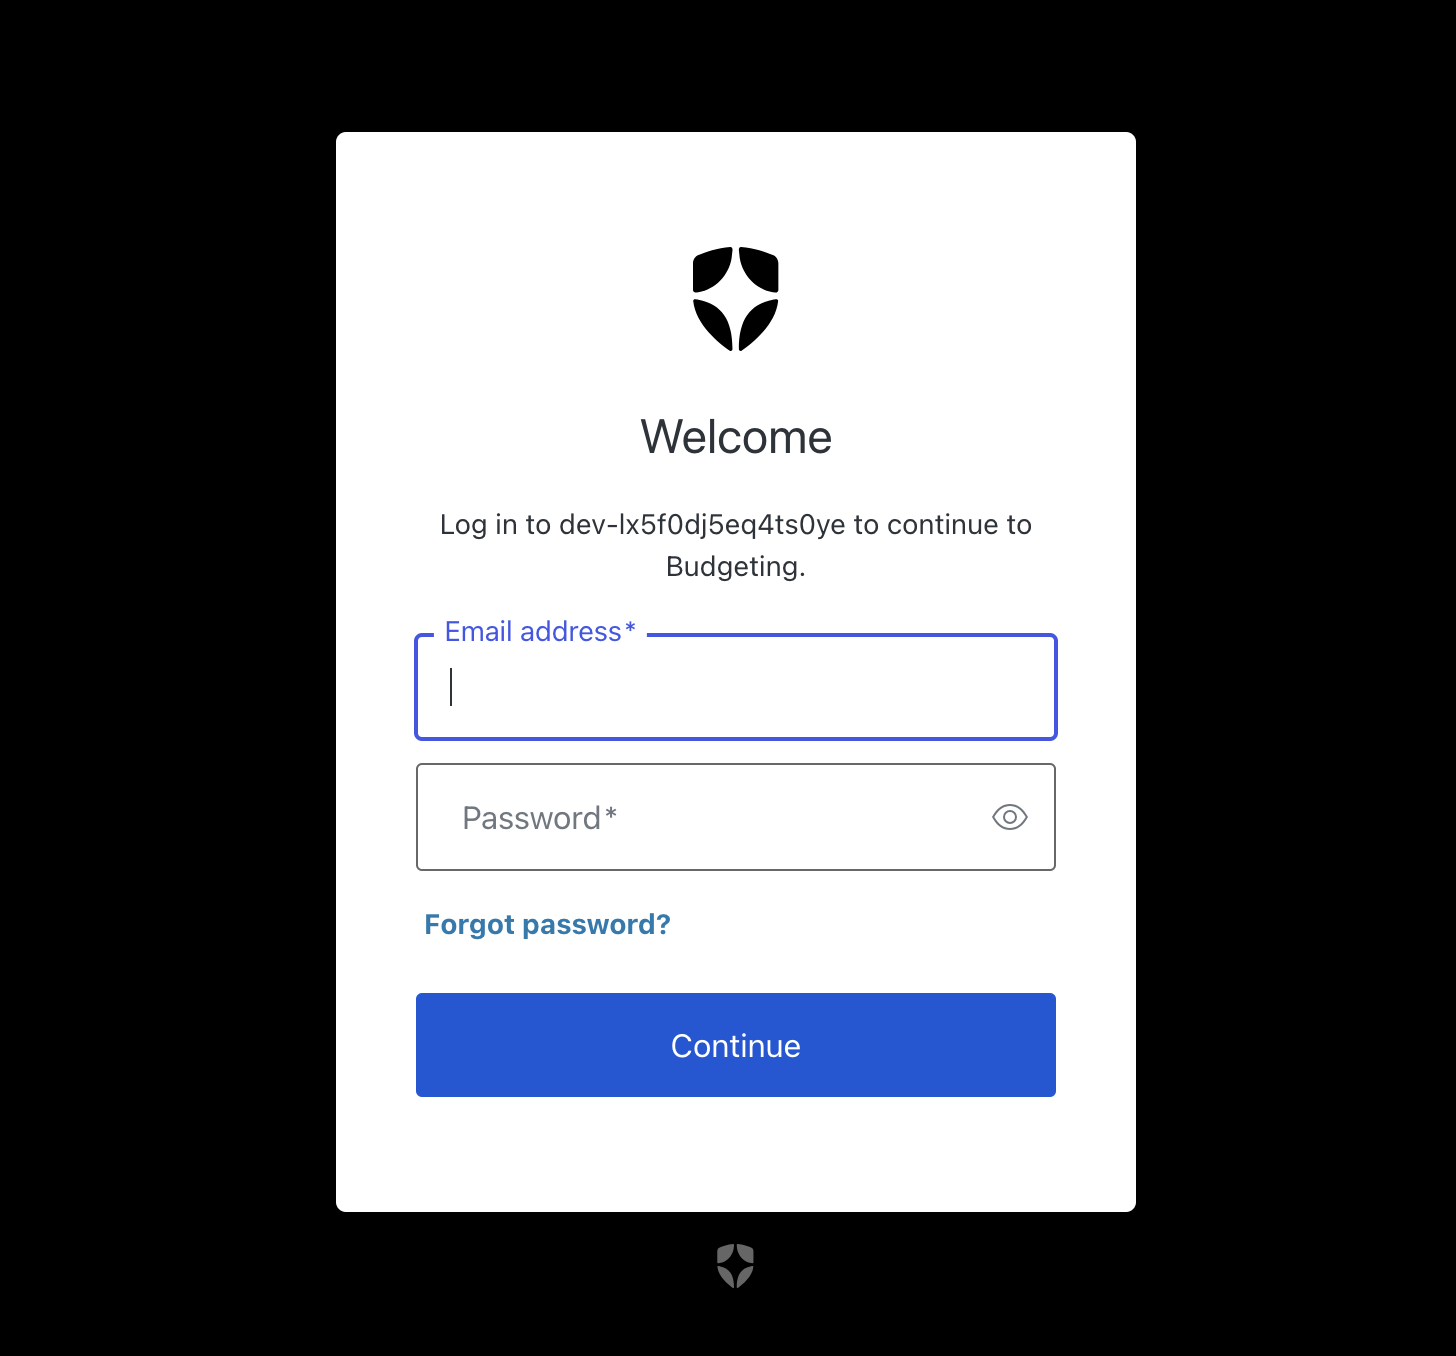
Login with Auth0.
Finally, after entering your Auth0 login details, you’ll land at a special stripped down version of the Cloud Console for Workforce Identity Federated users.
The Federated Google Cloud Console supports fewer services than normal.
If all of this works, congratulations you’ve setup Workforce Identity Federation with Auth0 correctly! The final step is to configure IAP to use it to authenticate and authorise users trying to access your website.
Step 3: Configure IAP to use Auth0
To configure IAP to use the Workforce Identity Federation pool we need to create an IAM oauth client and client secret. NOTE: this oauth client is distinct from an IAP oauth client (the naming is very confusing). We then need to configure IAP to use the Workforce Identity Federation pool and the oauth client and secret.
The Terraform below creates these resources.
resource "google_iam_oauth_client" "oauth_client" {
  oauth_client_id       = "iap-wfif"
  location              = "global"
  project               = "<PROJECT_ID>"
  allowed_grant_types   = ["AUTHORIZATION_CODE_GRANT"]
  # Another confusing point is the client ID in the allowed redirect URIs you don't have
  # until AFTER the client is created. See below for how to navigate this.
  allowed_redirect_uris = ["https://iap.googleapis.com/v1/oauth/clientIds/ad118cb87-d2c4-478b-9d18-2a4fed26ada9:handleRedirect"]
  allowed_scopes        = ["https://www.googleapis.com/auth/cloud-platform"]
  client_type           = "CONFIDENTIAL_CLIENT"
  display_name          = "iap-wfif"
  description           = "An application registration for iap-wfif"
}

resource "google_iam_oauth_client_credential" "auth0-wif-secret" {
  oauthclient                = google_iam_oauth_client.oauth_client.oauth_client_id
  location                   = google_iam_oauth_client.oauth_client.location
  oauth_client_credential_id = "iap-wfif-secret"
  disabled                   = false
  display_name               = "iap-wfif client credential"
}

resource "google_iap_settings" "iap_settings" {
  name = "projects/<PROJECT_ID>"

  access_settings {
    workforce_identity_settings {
      workforce_pools = [google_iam_workforce_pool.auth0_pool.id]
      oauth2 {
        client_id     = google_iam_oauth_client.oauth_client.client_id
        client_secret = google_iam_oauth_client_credential.auth0-wif-secret.client_secret
      }
    }
  }
}
The one tricky bit in this Terraform snippet is you don’t have the client ID until after the client is created, so initially you need to create it with allowed_redirect_uris = []. Once created you can find the client ID with the following gcloud command.
gcloud iam oauth-clients describe iap-wfif --project <PROJECT_ID> --location global
Once applied, when navigating to your Cloud Run website you should be greeted with the Auth0 login page. However, after signing in IAP will send you to the following page:
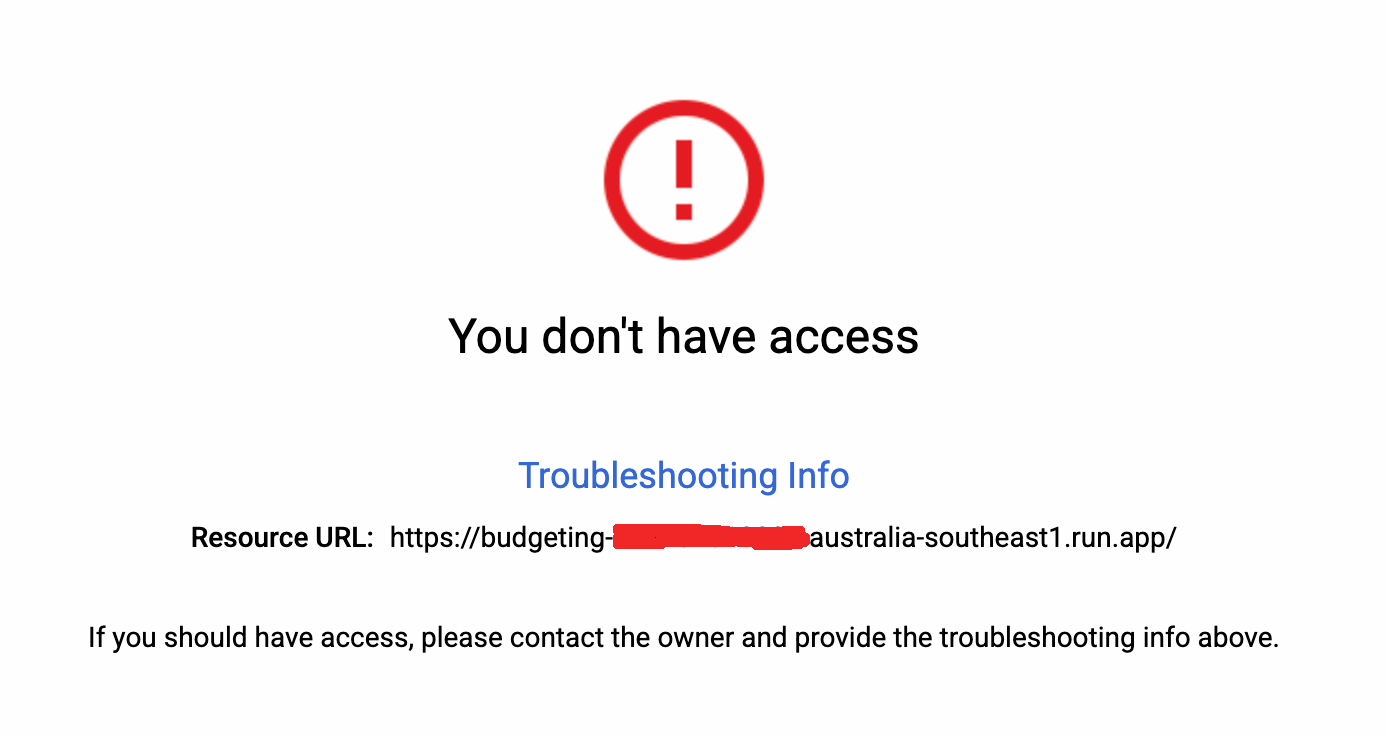
IAP says no.
The final step is to grant the Workforce Identity Federation pool access to IAP.
resource "google_project_iam_member" "iap_access" {
  project = "<PROJECT_ID>"
  role    = "roles/iap.httpsResourceAccessor"
  member  = "principalSet://iam.googleapis.com/${google_iam_workforce_pool.auth0_pool.id}/*"
}
For simplicity’s sake we’re binding this at the project level (we only have one Cloud Run service) and to the entire Workforce Identity Federation pool (we only have two users), but in a real environment you would likely bind this to the Cloud Run service and add attribute conditions such as enforcing the user belongs to a specific group.
Once that binding has been given 5-10 minutes to propagate, you should finally be allowed through to the website!
Conclusion
In this post, we walked through setting up Workforce Identity Federation with Auth0 and IAP using Cloud Run’s native integration. Security can feel daunting, but by relying on Google services like IAP and Workforce Identity Federation, you can create a smooth, secure sign-in flow for your Cloud Run-hosted websites, all without spending a cent!
Have questions about Google Cloud? Feel free to reach out through the contact page or connect with me on social media.